Thermal/Temperature Monitoring/NVR Setup
Temperature Monitoring Solution Camera & NVR Setup
Contents
- 1 Temperature Monitoring Solution Camera & NVR Setup
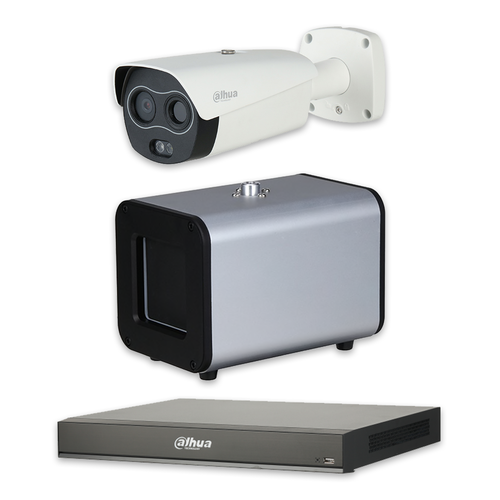
This guide will cover the initial NVR, camera,and Blackbody setup and Configuration for the Thermal Temperature Monitoring Solution
If you're using a stand alone Thermal Camera (not plugged directly into NVR), follow the steps to set up Thermal Monitoring solution with stand alone Thermal camera
Description
This guide will cover the initial NVR, thermal camera, and Blackbody setup Configuration for the Thermal Temperature Monitoring Solution
Prerequisites
- DH-TPC-BF3221-T or DH-TPC-BF5421-T Thermal Hybrid Network Camera
- Thermal camera updated to latest firmware - How To Update TPC-BF5421-T Firmware
- JQ-D70Z Blackbody
- Temperature Monitoring Physical Setup
- Initial NVR Setup guide followed
Video Instructions
NVR Initial Setup and Firmware Upgrade:
Total Setup of Thermal Solution through NVR with Camera, including Record Setup and configuration at webUI:
Step by Step Instructions
Test
NVR Initialization
Initialize the NVR over the network using a local computer
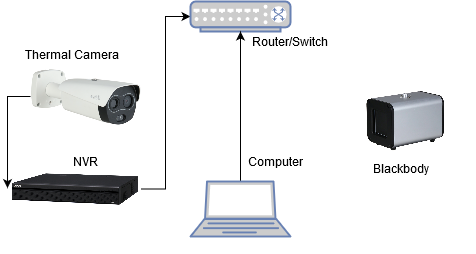
- Plug the Thermal camera into the PoE port on the back of the NVR
- Connect the NVR to a router/switch
- Connect computer to router/switch
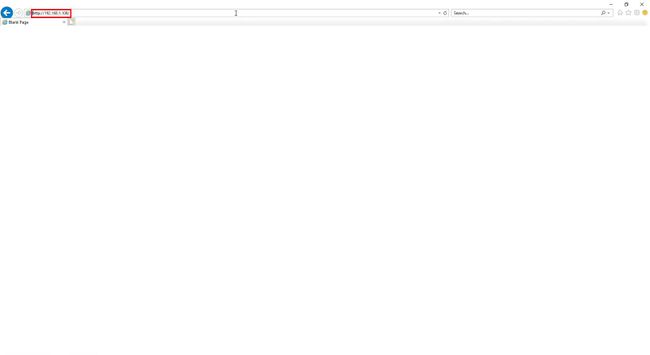
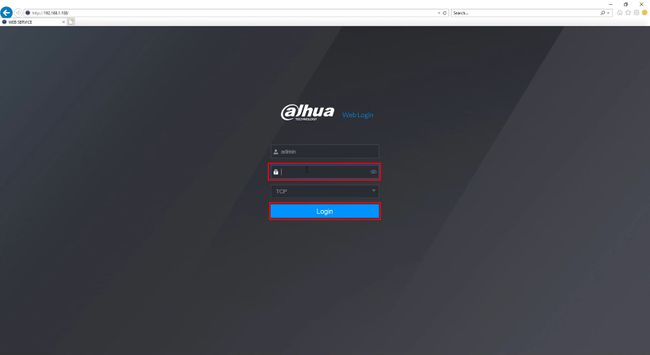
1. Enter the IP address of the NVR (default http://192.168.1.108) in Internet Explorer
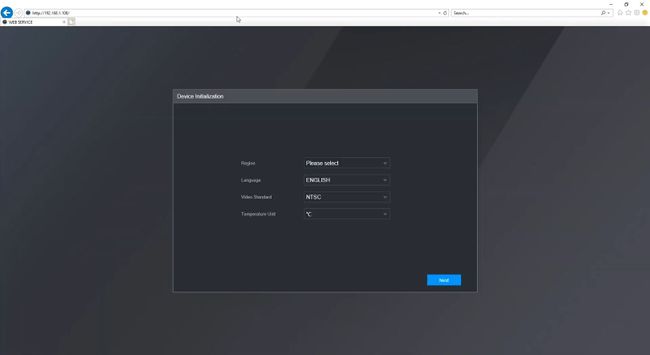
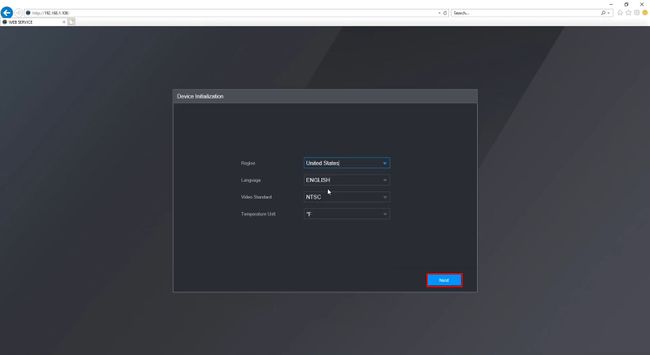
Proceed with Device Initialization
Select
- Region
- Language
- Video Standard
- Temperature Unit
Click Next
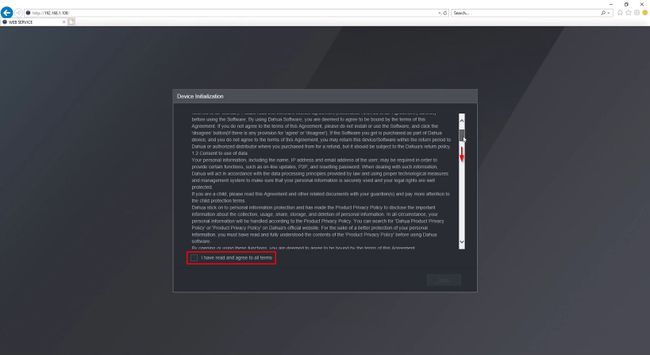
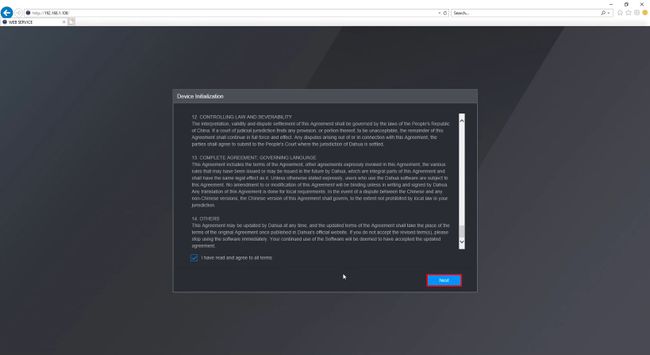
Scroll down to review the terms and check the box to agree
Click Next
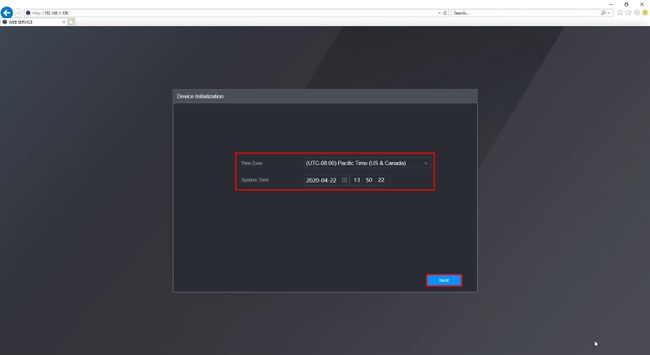
Set the Time Zone and System Time
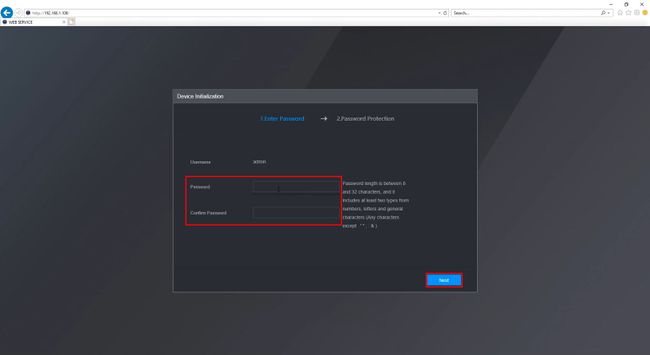
Create a password for the NVR and enter twice to Confirm
Click Next
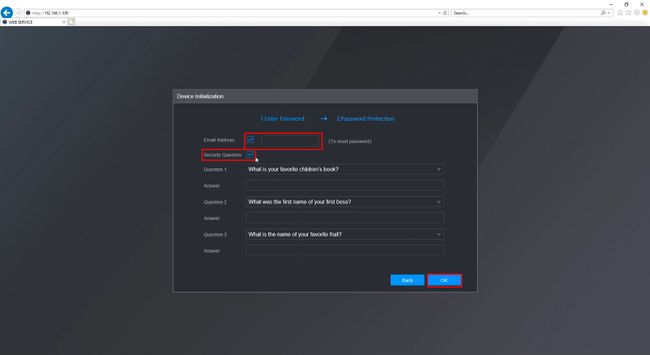
Check the box to enable the Password Protection/Reset options for Email Address and Security Question
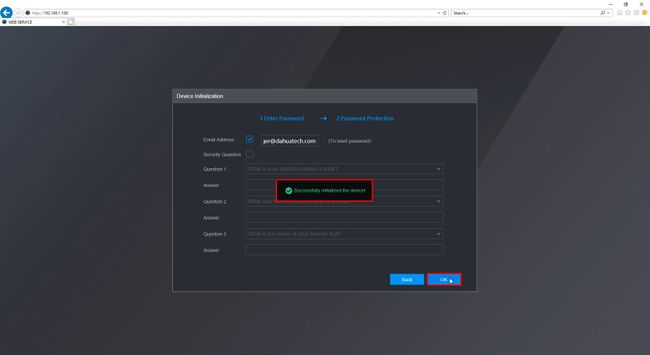
Click OK to proceed
A prompt will confirm a successful initialization
You can now log into the NVR's webUI to proceed with setup and configuration
Record Schedule Setup
Setup Video and Snapshot Recording for the Thermal Camera
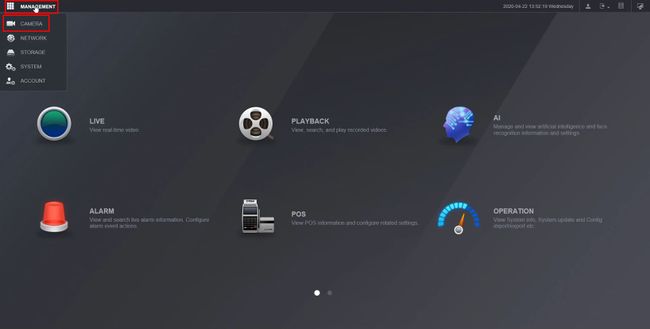
From the Main Menu click Management > Camera
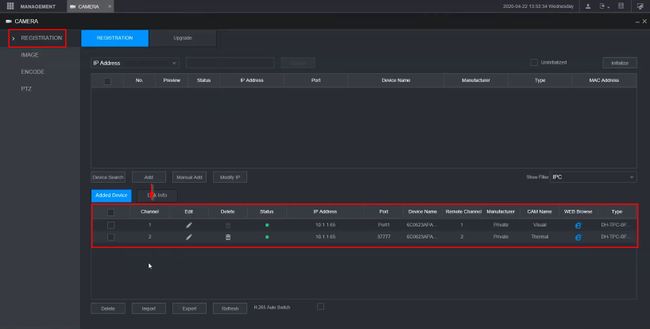
Under Registration
The thermal camera will appear in the Channel list as two channels, one for the visual channel and one for the thermal channel, in this example are Channels 1 and 2
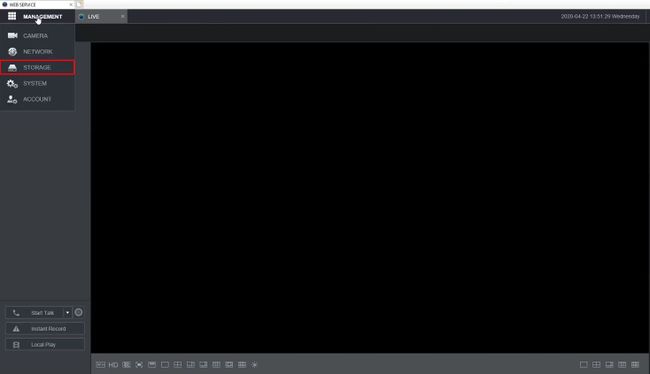
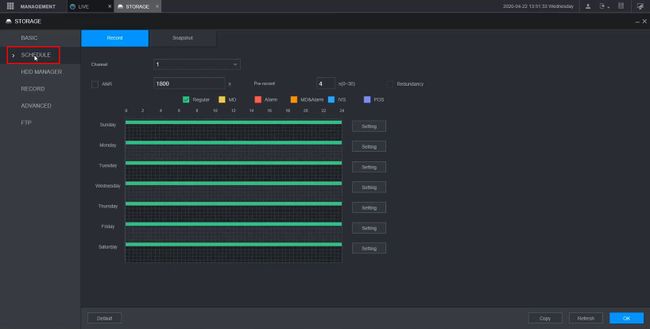
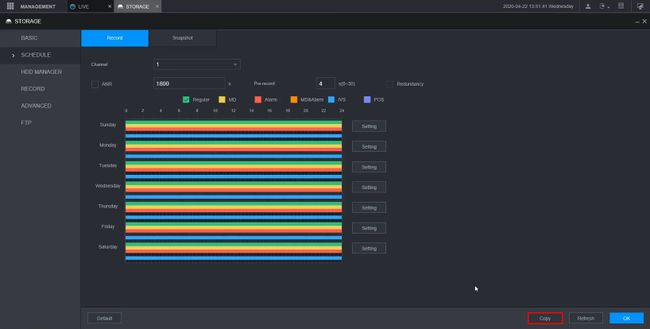
Click Management > Storage
Click Schedule
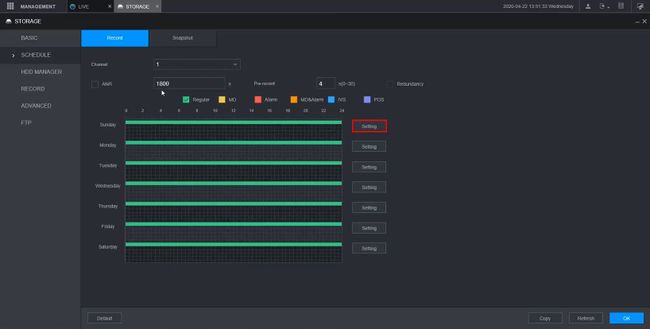
Click Setting to adjust the Record schedule (when the camera will record) for the thermal camera channel
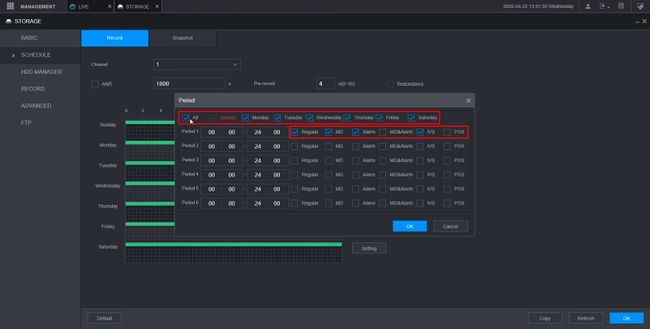
Use the interface to select the days and enter a Time Period. Select the Record type you wish to record for the camera: Alarm and IVS must be enable for the Temperature Alarm to record.
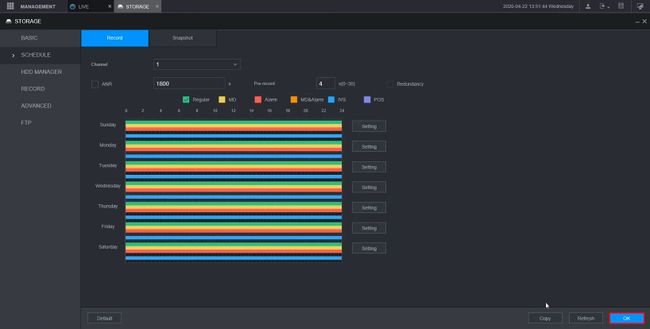
Click OK
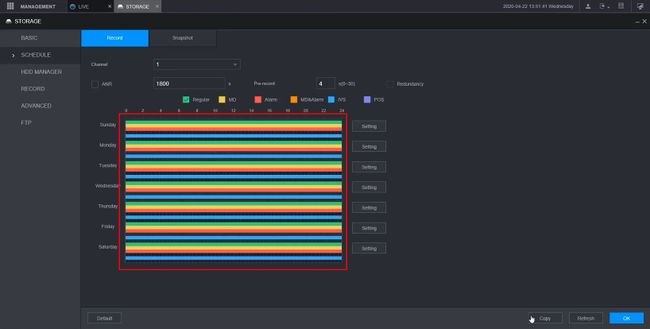
The schedule will be updated
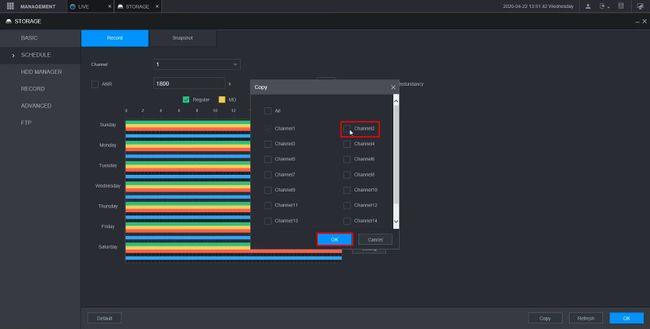
Click Copy
Select the other channel of the Thermal Camera (in this example Channel 2)
Click OK
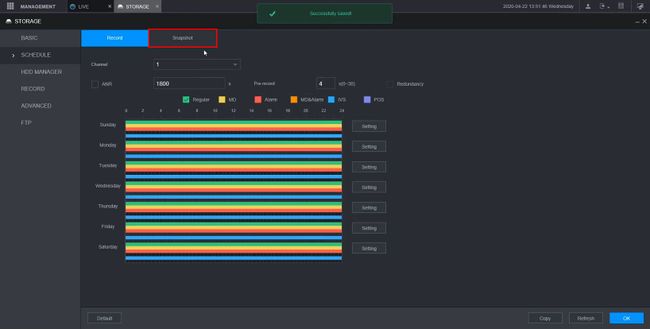
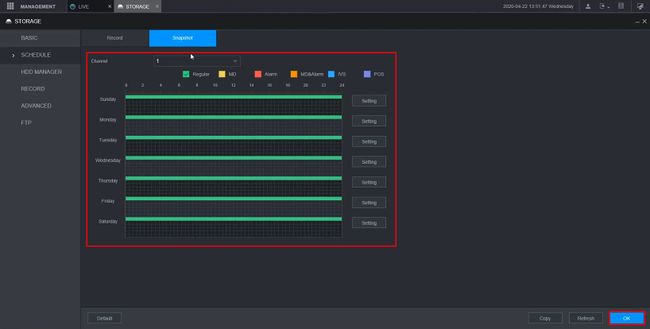
Click the Snapshot tab
Configure the Snapshot schedule record settings the same way s the previous steps
Click OK to save
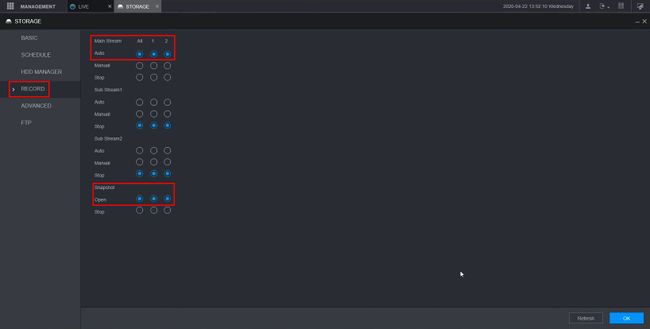
Click Storage > Record
Thermal Configuration
Configure the settings of the Temperature Monitoring Solution
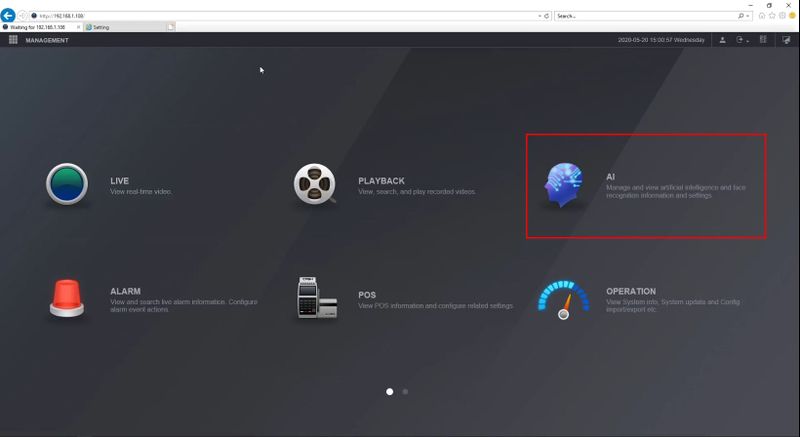
1. From the Main Menu of the webUI select AI
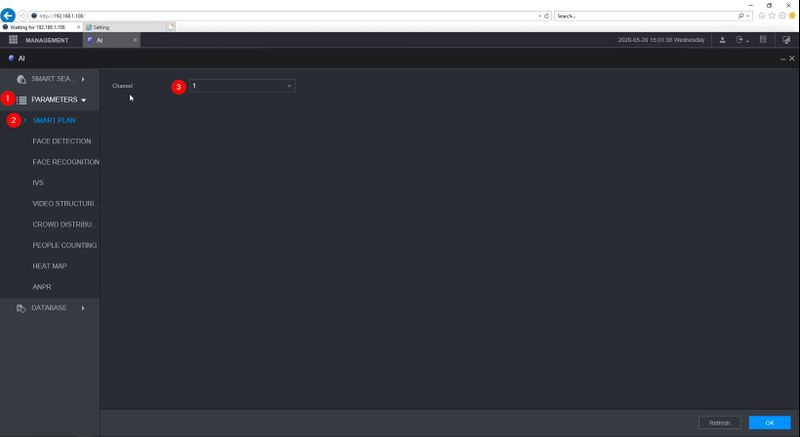
2. Click Parameters > Smart Plan
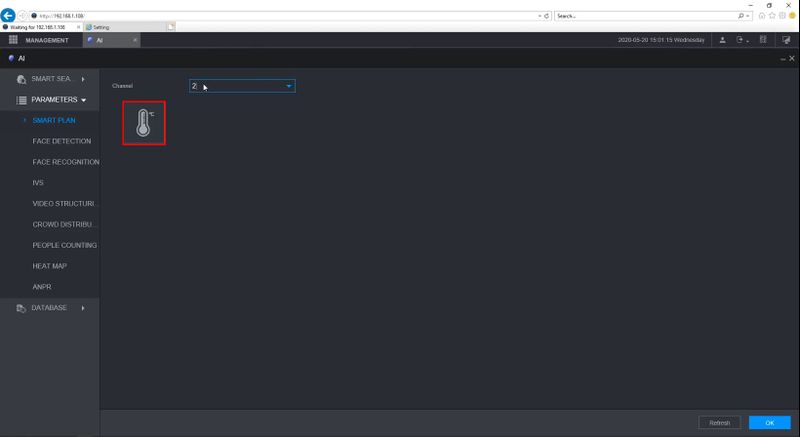
Use the dropdown to select the Thermal Channel
3. Click to enable the Thermal Temperature Monitoring Smart Plan
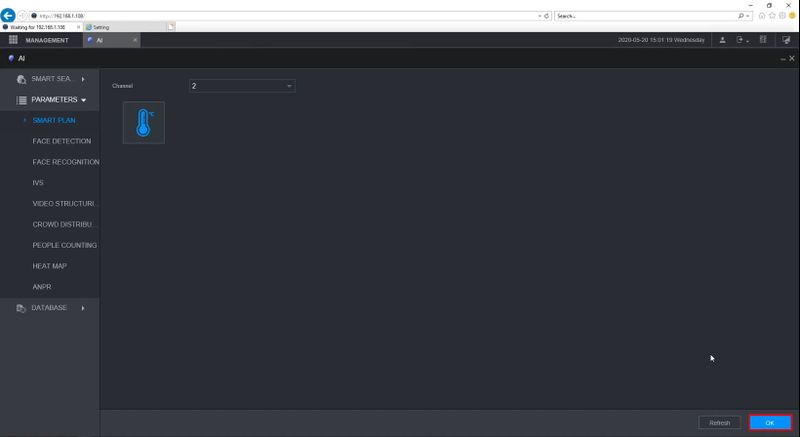
Click OK
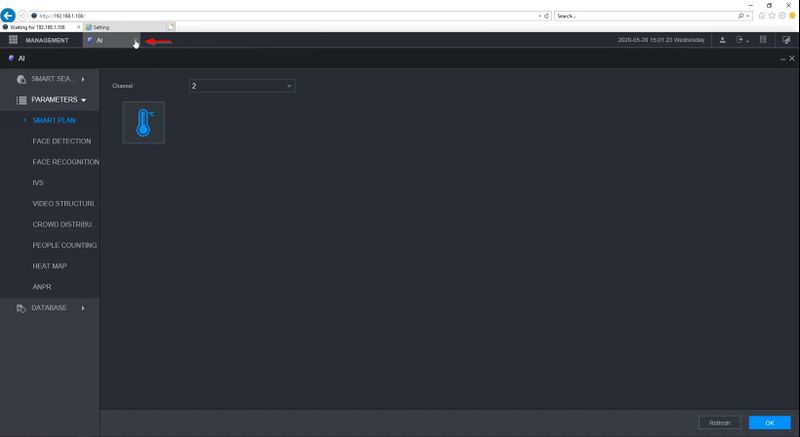
Return to the Main Menu by closing the AI tab (clicking X)
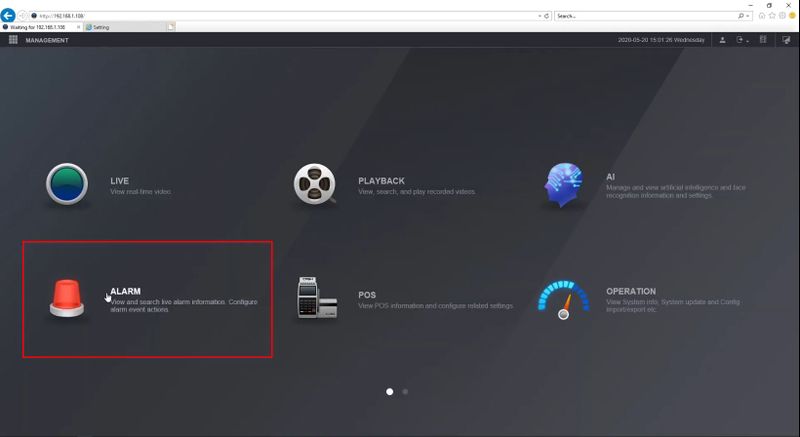
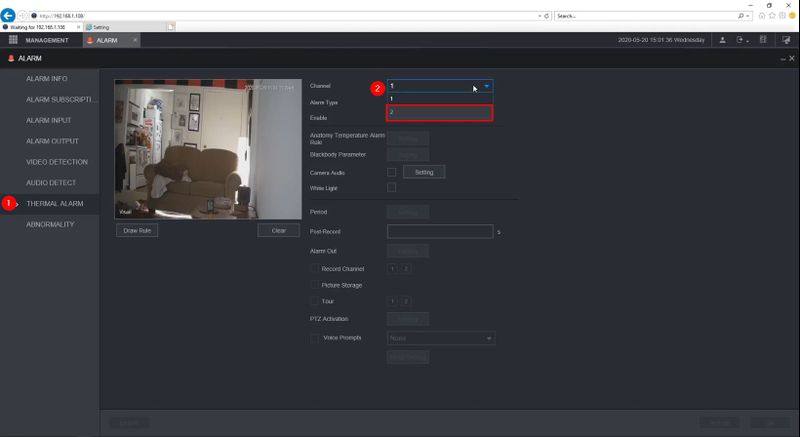
4. Click Alarm
5. Click Thermal Alarm
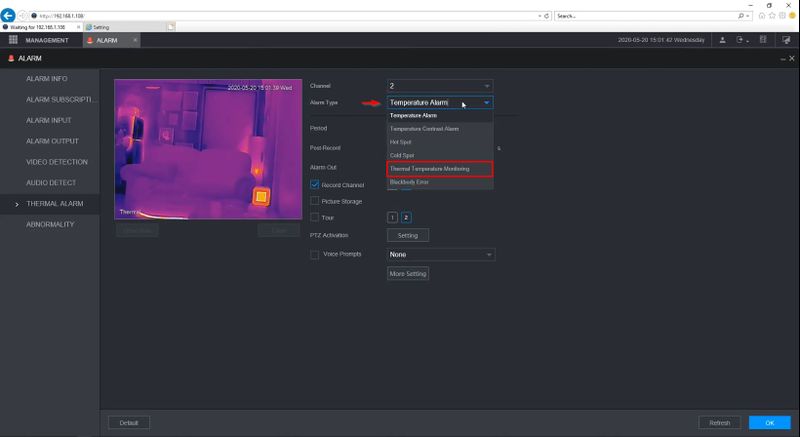
Use the dropdown to select the Thermal Channel
Select Thermal Temperature Monitoring
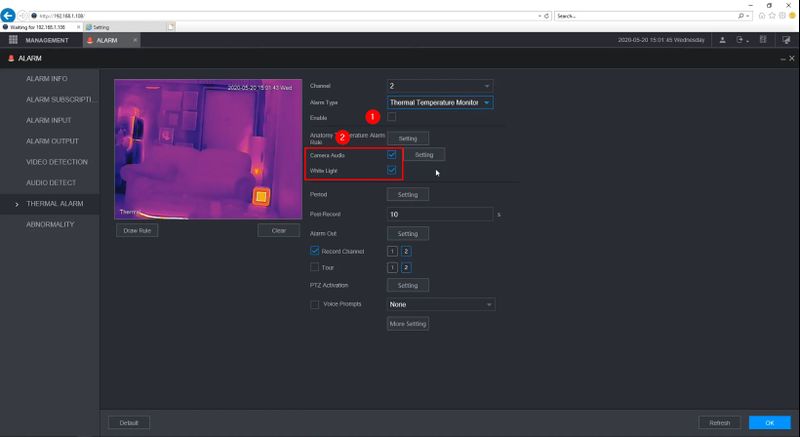
6. Check the box to enable feature
Check the box to enable desired camera hardware response on alarm:
- Camera Audio - audio from camera speaker
- White Light - light from camera
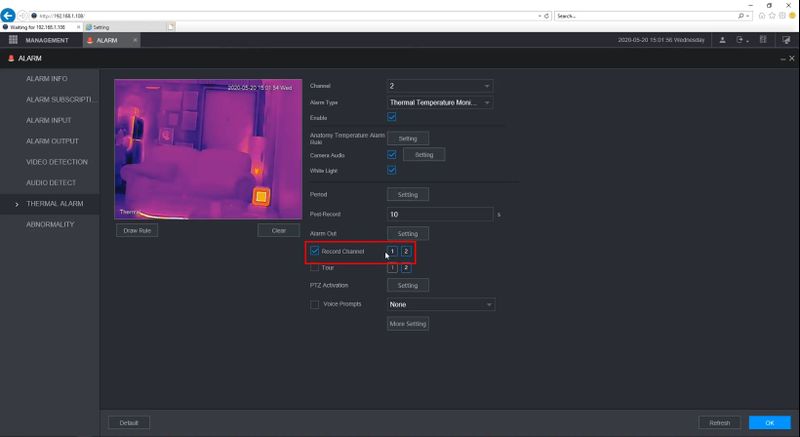
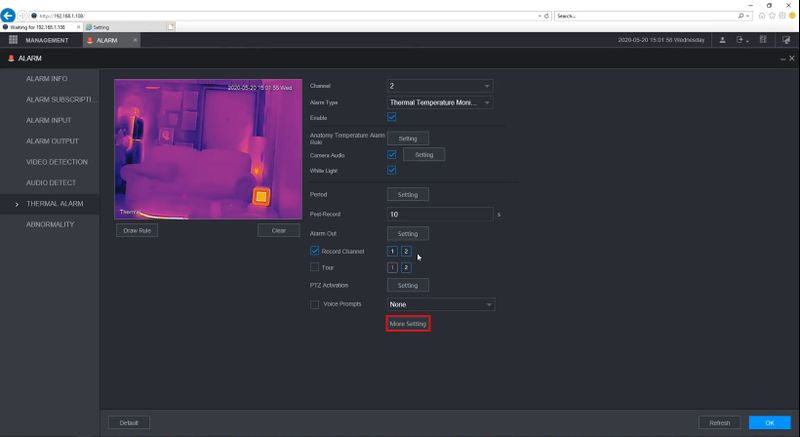
To record Alarms, check the box next to Record Channel and select which channel(s) to record
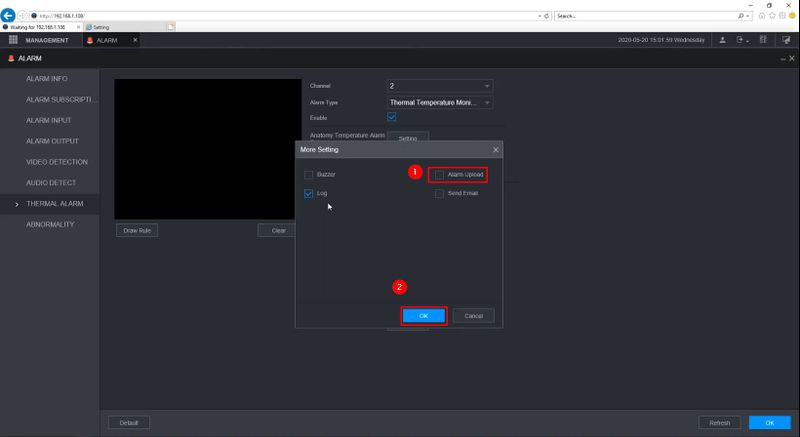
Click More Setting
Check to enable Alarm Upload
Click OK
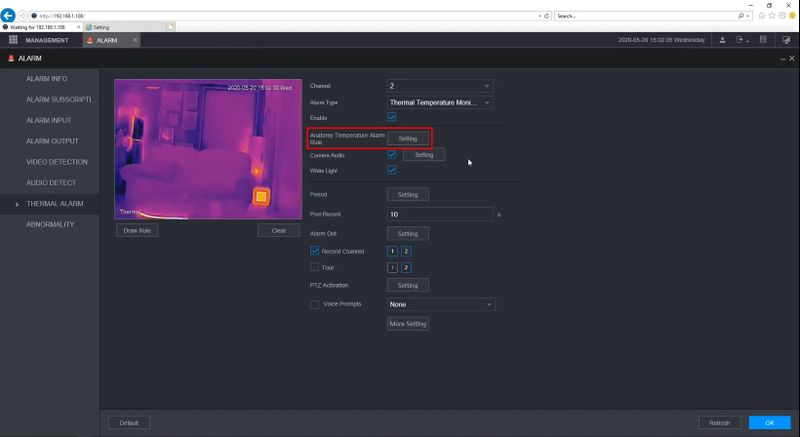
Set temperature values for the alarm to trigger
5. Click Setting next to Anatomy Temperature Alarm Rule
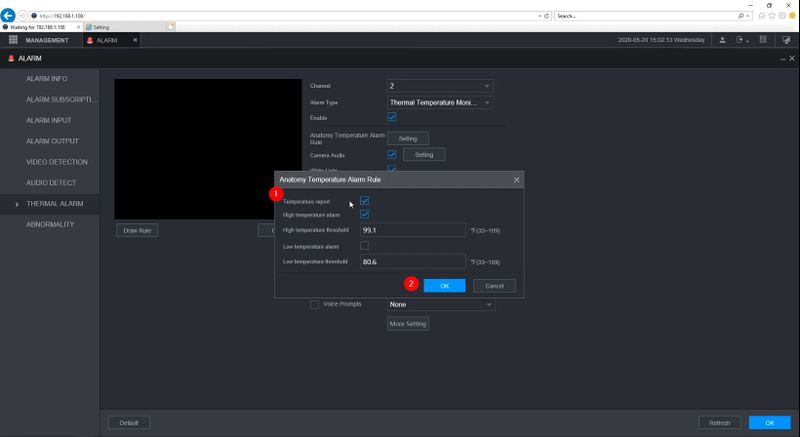
Check the box to enable Temperature report - this will report/display all temperature values
Check the box to enable High Temperature Alarm - an alarm will be sent when the temperature is higher than or equal to this value
Click OK
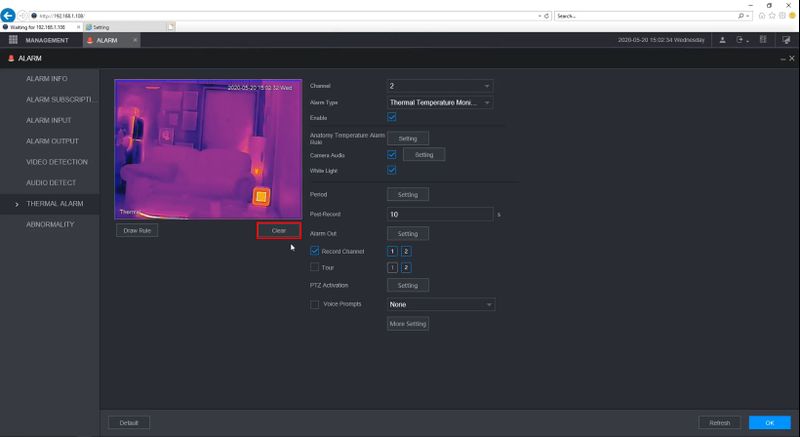
Draw Rule for Detection Region
By default the entire camera frame will be set as the detection region
1. Click Clear to default the Rule
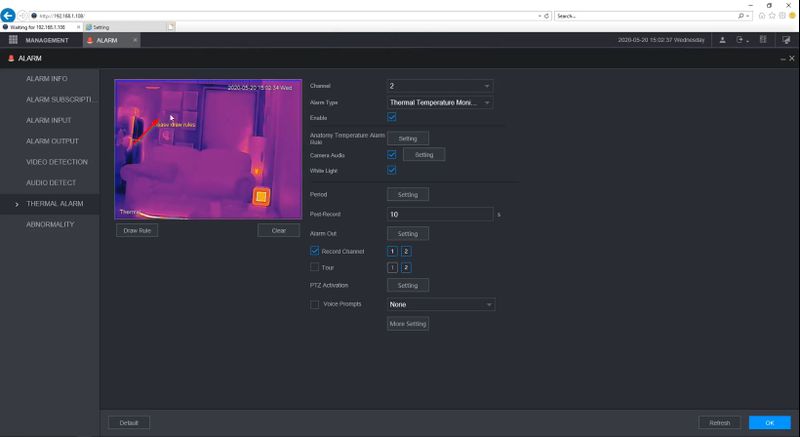
Click Draw Rule
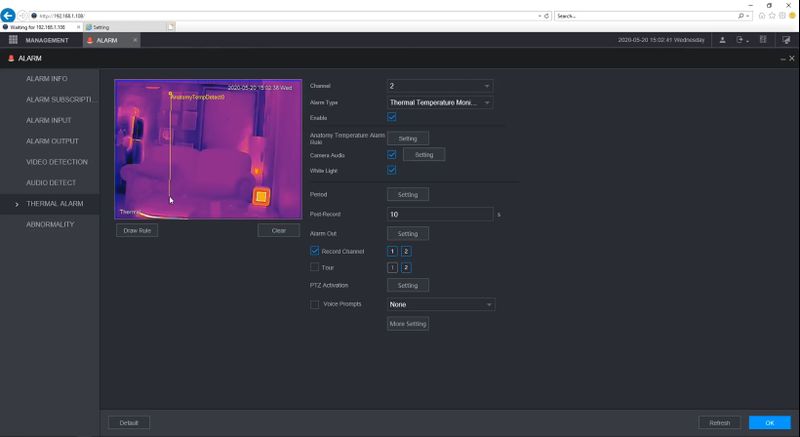
2. Left click inside the frame to begin drawing the detection zone.
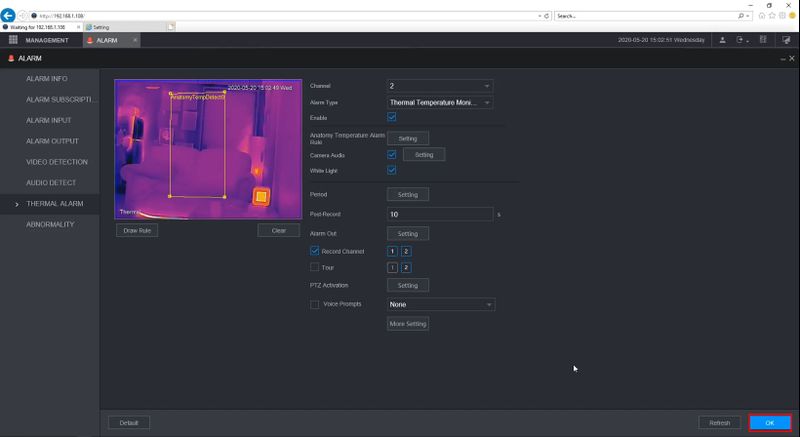
Click and drag to draw lines to complete a square/box
Complete:
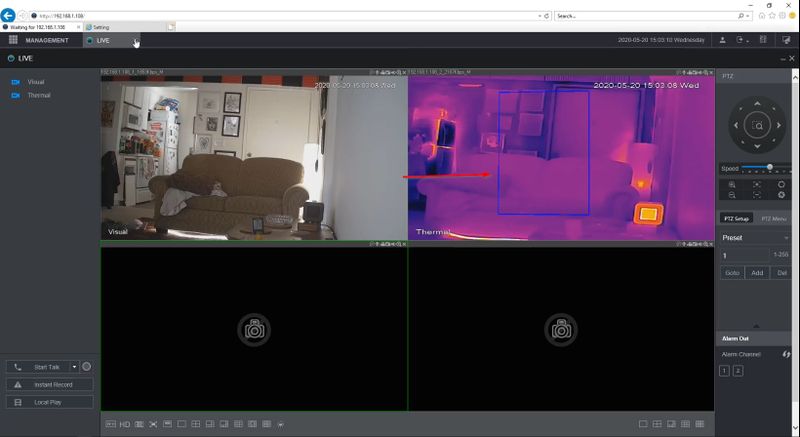
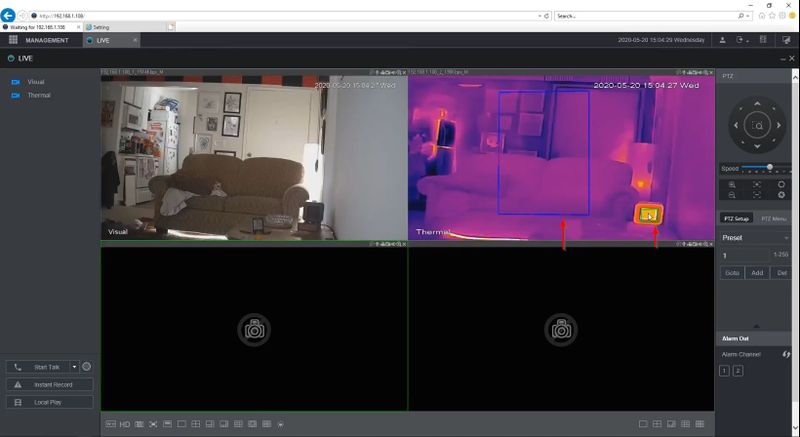
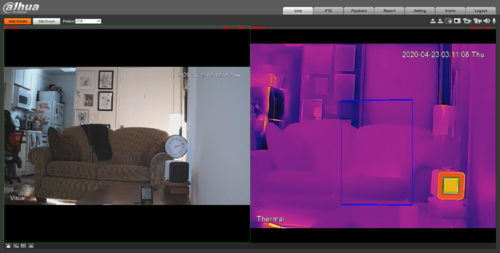
This detection zone will be the blue box displayed in Live View interface:
Blackbody Setup
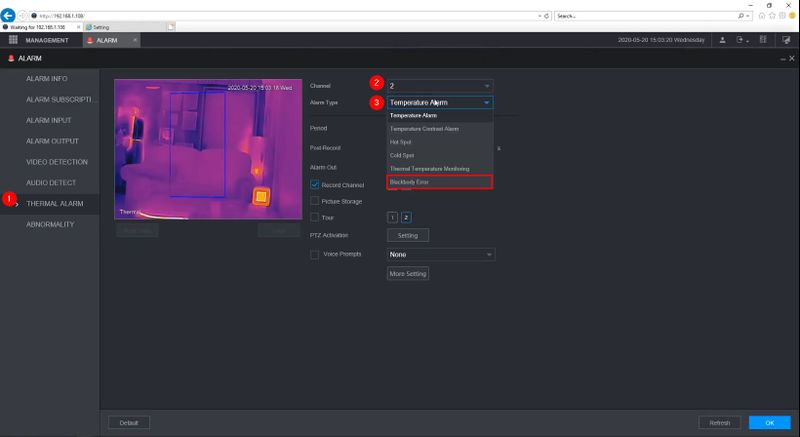
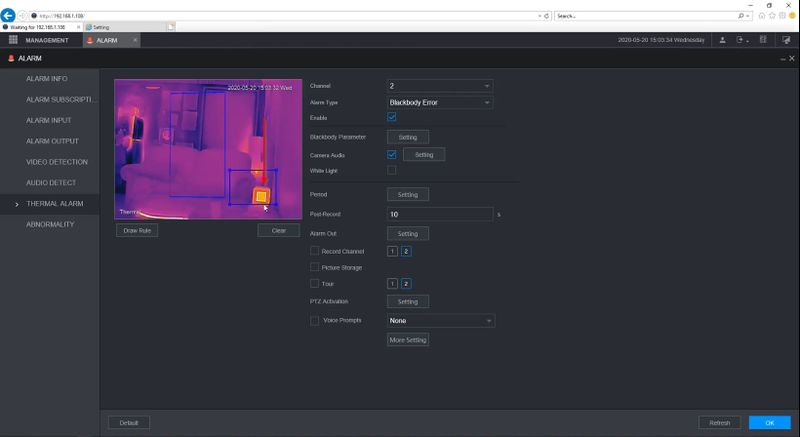
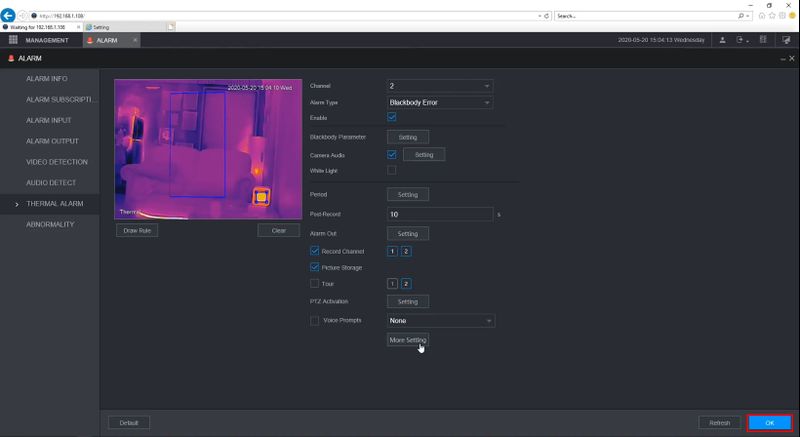
1. From Main Menu click Alarm > Thermal Alarm
- Use the dropdown box to select the Thermal channel
- Use the dropdown to select Blackbody Error
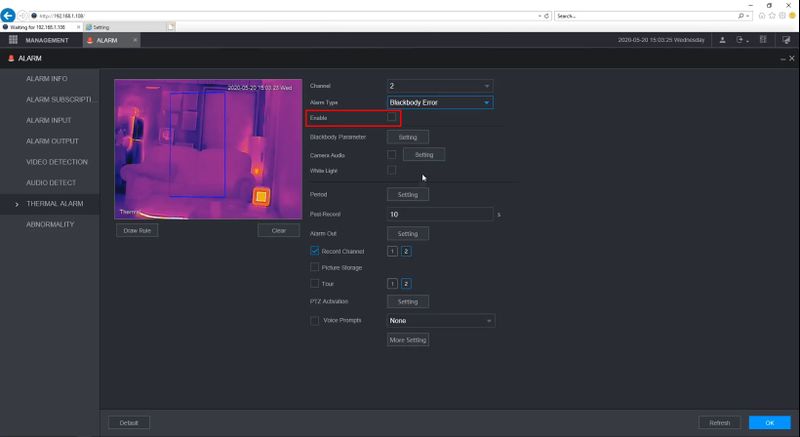
2. Check the box to Enable
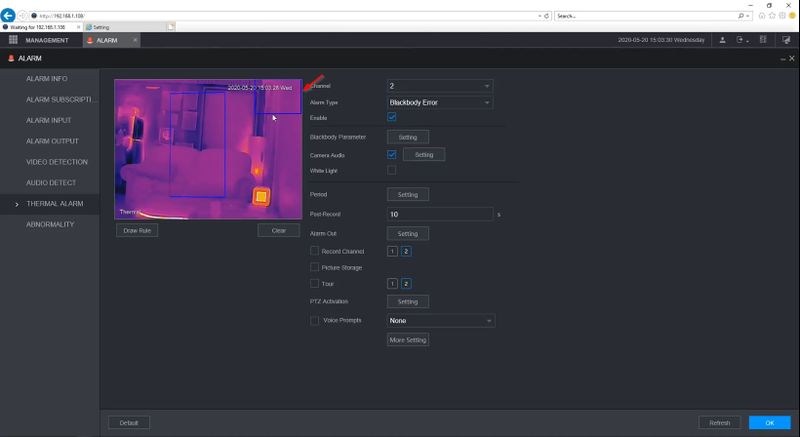
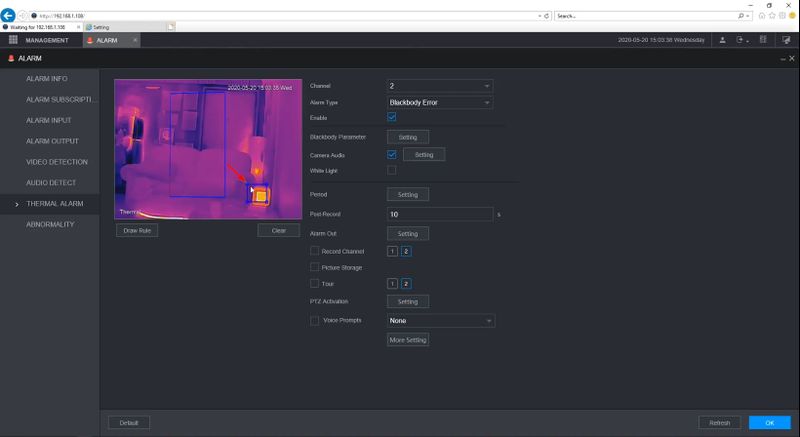
The default Blackbody rule will be displayed on screen as a blue box
Click to drag the box to position
Click the corners to adjust the size of the box
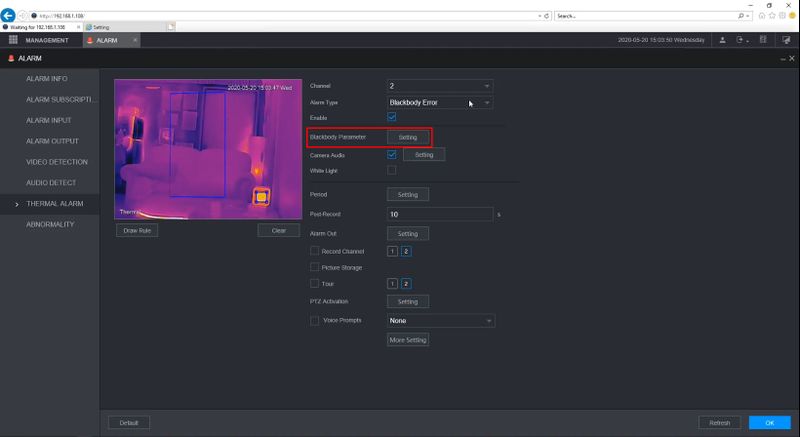
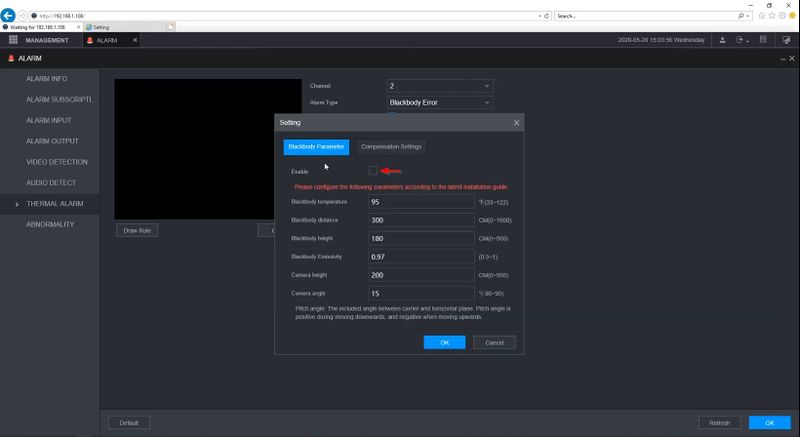
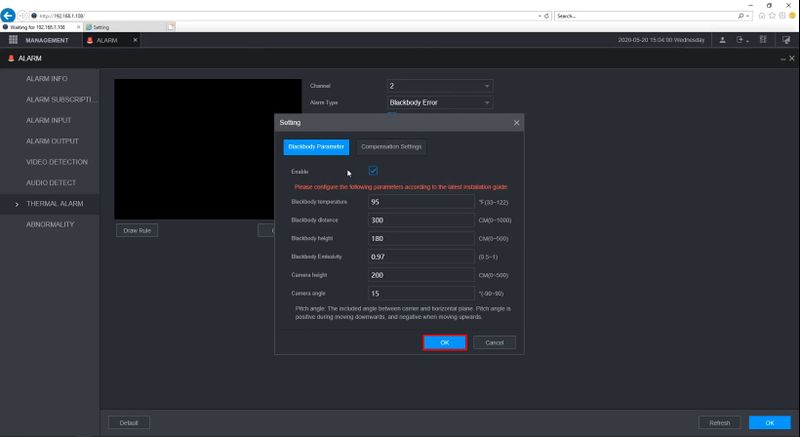
Click Setting next to Blackbody Parameter to adjust the settings of the Blackbody
Check the box to Enable
Enter desired Blackbody parameters (leave at default for most scenarios)
Blackbody temperature should be set to 95 F / 35 C
Click OK to save
Additional Alarm Parameters
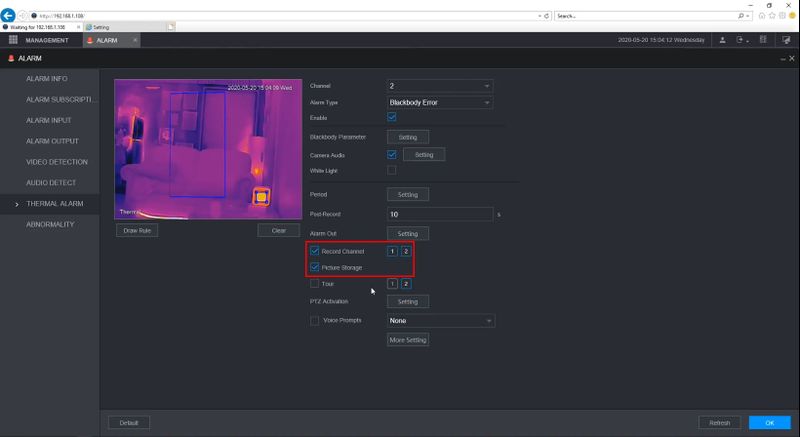
Select which Channel(s) will be recorded
Check to enable Picture Storage
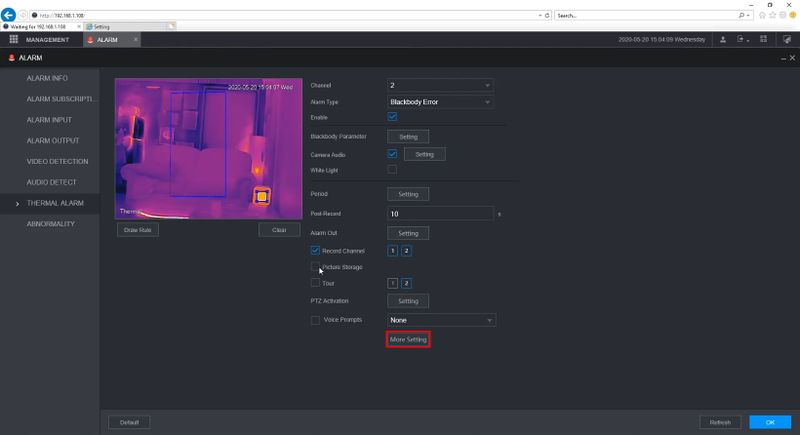
2. Click More Setting
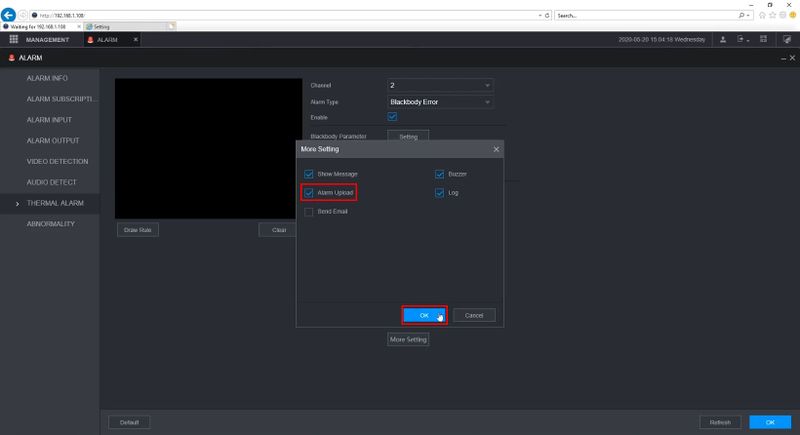
Check the box next to Alarm Upload
Select any other desired Alarm parameters:
- Show Message
- Buzzer
- Send Email How To Setup Email Notifications On Dahua Recorder
- Log
Click OK
Click OK to save all settings
Event Verification
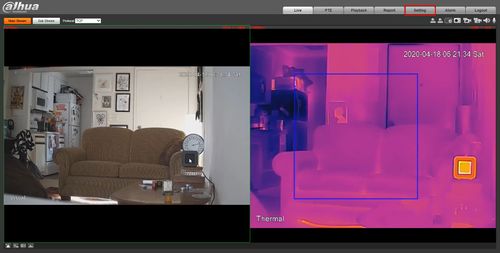
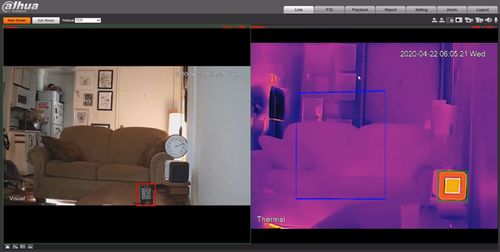
Live View will display the detection zone and Blackbody reference
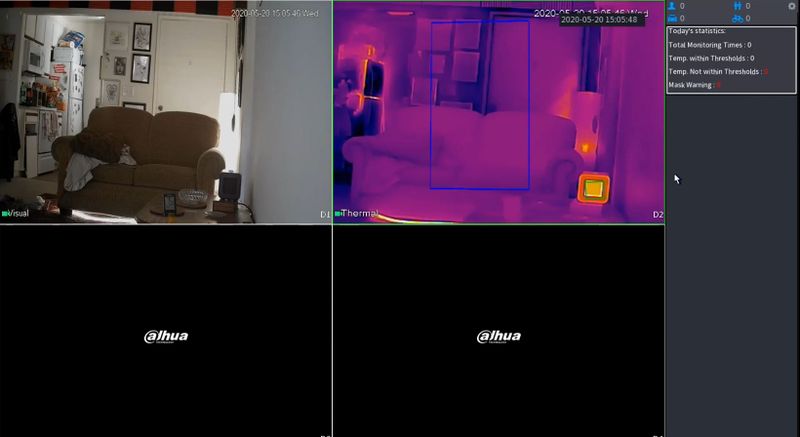
Live View (at local interface/display) will show the detection zone and blackbody reference
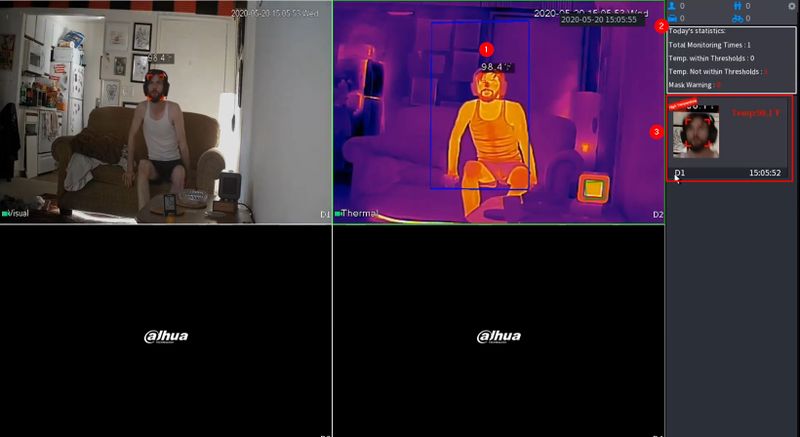
Once configuration is complete, go to Live interface to verify temperature measurement
Live View (Right click > AI Mode enabled)
- Temperature detection value will appear
- Statistics will be displayed in top right of screen
- Live events will populate the right side of the screen
- Check measurement value on screen
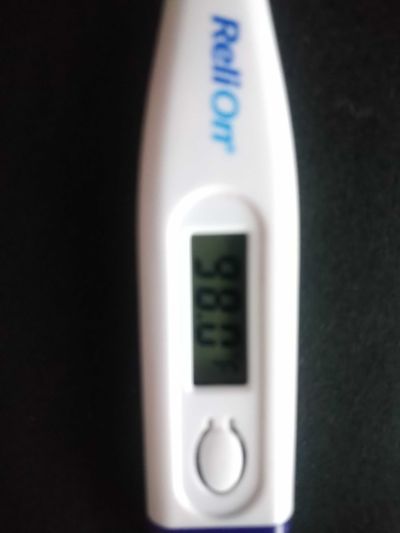
- Compare it with the value on another device for temperature, such as thermometer:
Thermal Camera Configuration: (click to expand each section)
Check latest firmware and upgrade
Open smart thermal of human body temperature measurement
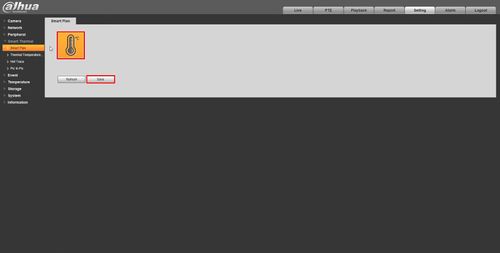
Enable the Smart Thermal Smart Plan for the Thermal Camera
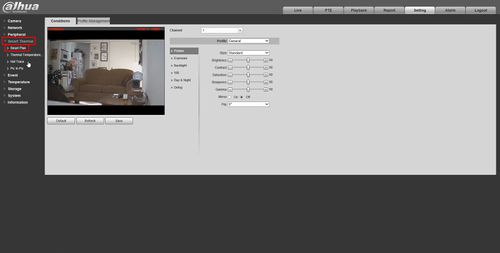
- Log into Camera
Click Setting
Click Smart Thermal > Smart Plan
Click the ![]() icon to enable the plan.
icon to enable the plan.
Click Save
Set rules of human temperature measurement
Set Rules Of Human Temperature Measurement
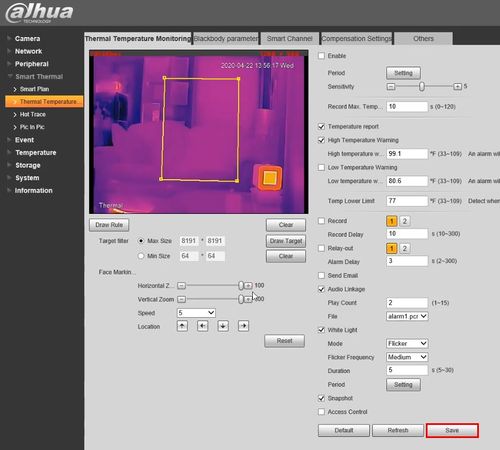
Configure the parameters for the Human Temperature Measurement
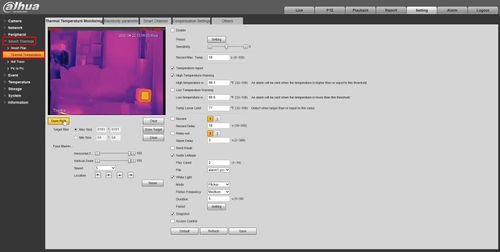
- Log into Camera
Click Setting
Click Smart Thermal > Thermal Temperature Monitoring
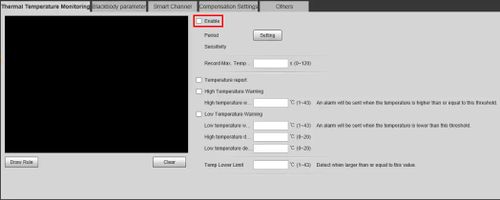
Check the box to enable human temperature measurement
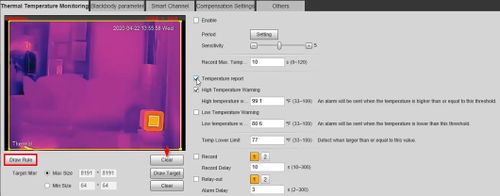
Check the box to enable Temperature report - this will report/display all temperature values
Check the box to enable High Temperature Warning - an alarm will be sent when the temperature is higher than or equal to this value
Click Draw Rule to configure the rule box
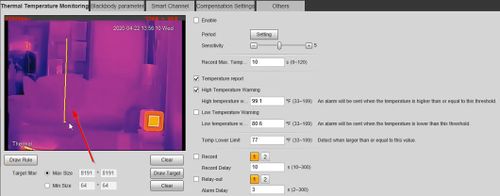
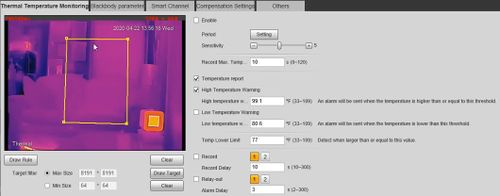
Left click inside the frame to draw the box
Completed
Click Save
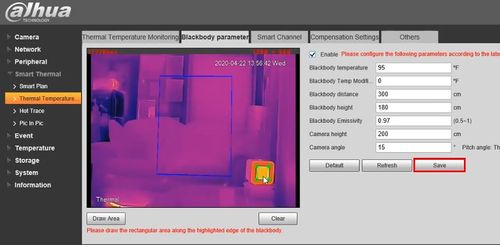
Set blackbody parameters
Set Blackbody Parameters
Configure the parameters for the Blackbody device for Human Temperature Measurement
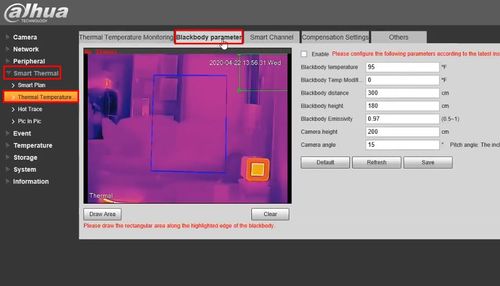
- Log into Camera
Click Setting
Click Smart Thermal > Thermal Temperature
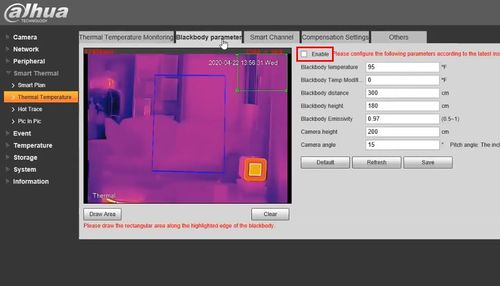
Select the Blackbody parameter tab
Check the box to enable
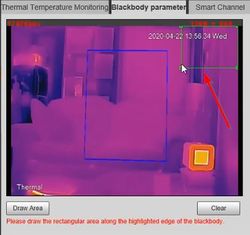
Click inside the video frame to select the green rule box
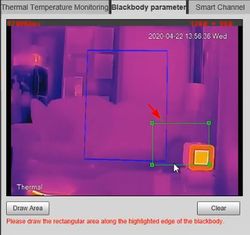
The rule needs to be drawn along the bold highlighted edge, just surrounding the highlighted area of the blackbody
Left click to drag and move the box and click the corners to resize the box
Click Save
Example of properly configured Blackbody box:
 ]
]Configure Advanced/Other Settings
Configure Advanced/Other Settings
Configure advanced/other parameters for the camera for Human Temperature Measurement
- Log into Camera
Click Setting
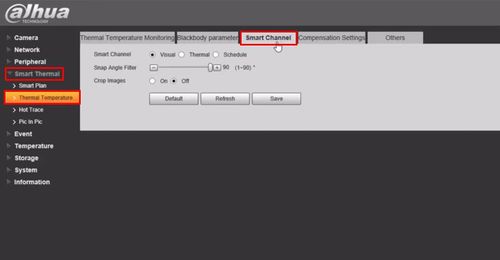
Click Smart Thermal > Thermal Temperature
Click the Smart Channel tab
Select which channel is used for Intelligent analysis
For normal scenes Visual channel is used to detect faces by default
For some scenes such as dark or with backlight environment, Thermal channel can be used
Snap Angle Filter - larger the value, easier it is to capture the side face
For example , when value is 1 , only the front face can be detected
Click SaveCheck environment temperature
Check Environment Temperature
If the default temperature parameters are not accurate this situation will affect the human body temperature measurement.
If human body temperature is inaccurate, try the following steps:
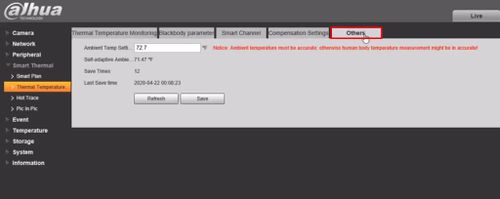
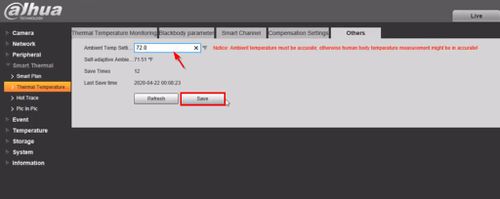
Step 1 - Ambient temperature
- Log into Camera
- Setting > Smart Thermal > Human temperature measurement > Others
- Use thermometer to detect the real ambient temperature on site and enter the number
- Click Save
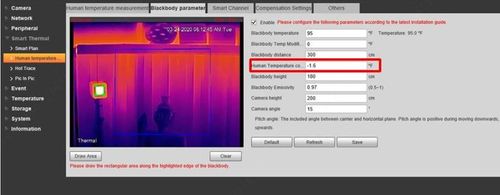
Step 2 - Human temperature correction
- Use a thermometer to detect the real Human body temperature:
Calculate the difference between real Human body temperature and measure the temperature from the thermal camera, enter this value in Human Temperature correction field.
Smart Thermal > Human Temperature Monitoring > Blackbody parameter:
For example: real Human body temperature is 98.6F (37C), measure temperature in thermal camera is 100F (37.8C)
Human Temperature correction should be 98.6 - 100 = -1.4
Click SaveEvent Verification
Event Verification
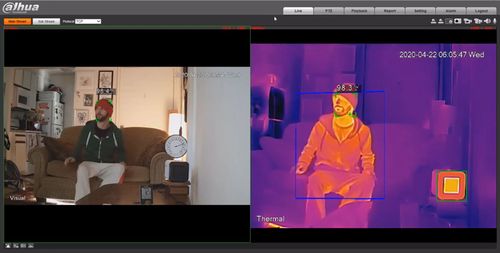
Once configuration is complete, go to Live interface to verify temperature measurement
- Log into Camera
- Check measurement value on screen
- Compare it with the value on the frontal temperature gun, thermometer ( if available)
