Access Control/How to Add Access Controller to SmartPSSAC
NOTICE
Notice of Discontinuation of SmartPSS
Description
This article will show the steps on how to add an Access Controller to SMARTPSS-AC and change the Door Names easily identify the doors as we go through the configurations.
Important
- Access Controller must be on latest firmware or it may continuously go offline. Please check the firmware version of your controller before continuing through the instructions.
Pre-requisites
Having an initialized Access Controller on the local network ready to go. Please Follow these instructions if not already done so:
- How to initialize DHI-ASC2204C-S with Configtool
- How to change IP Address to DHI-ASC2204C-S
- How to change the time and date of DH-ASC2204C-S
Step by Step Instructions
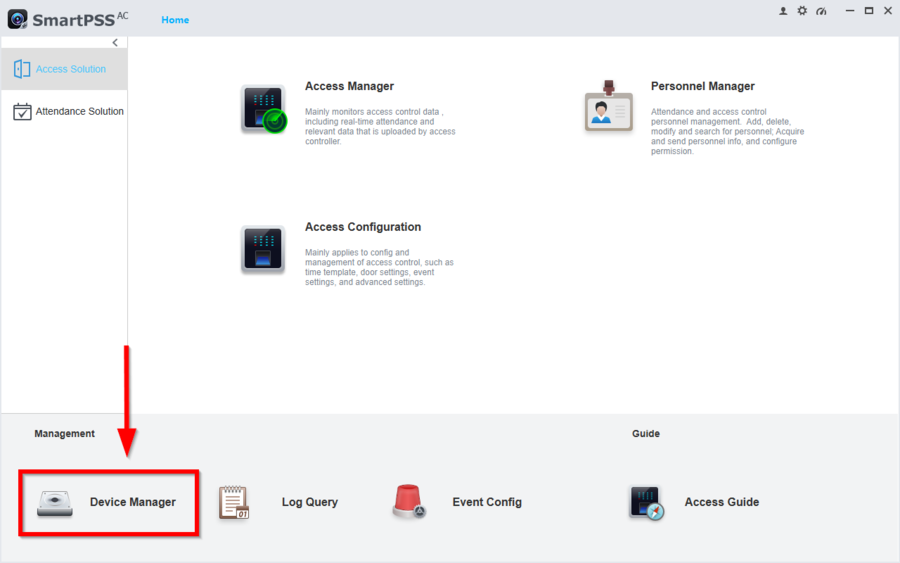
1. Open SmartPSS-AC and go to Device Manager
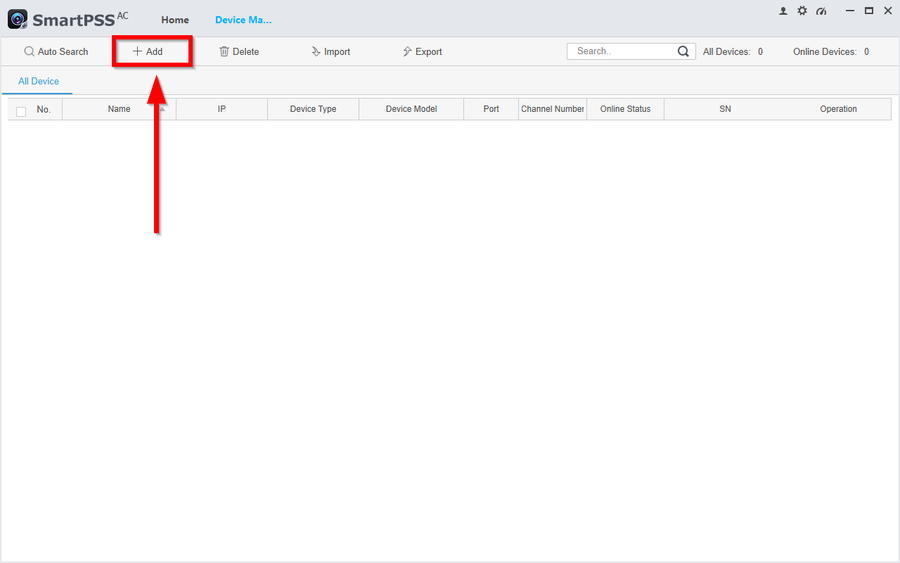
2. Click on Add
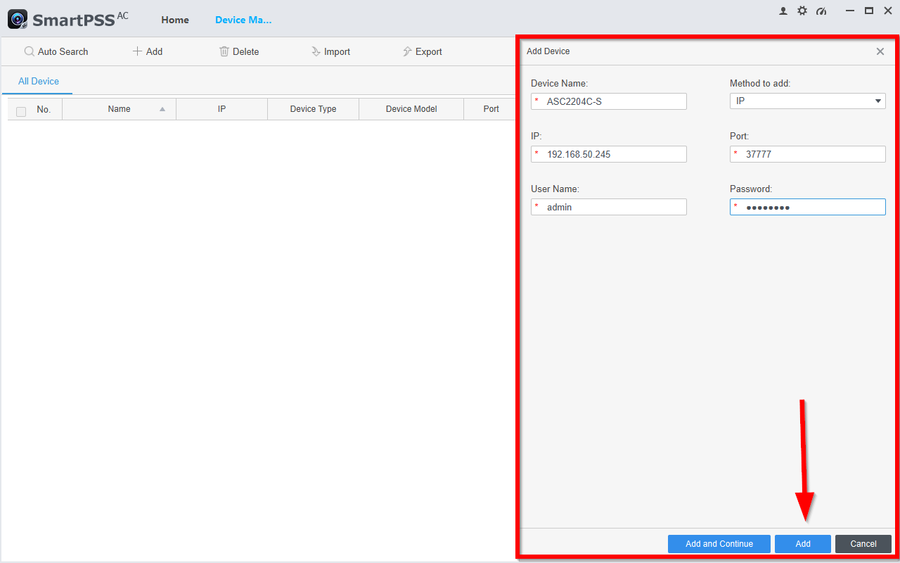
3. Enter the appropriate information of the access controller then click on add to finish adding the device.
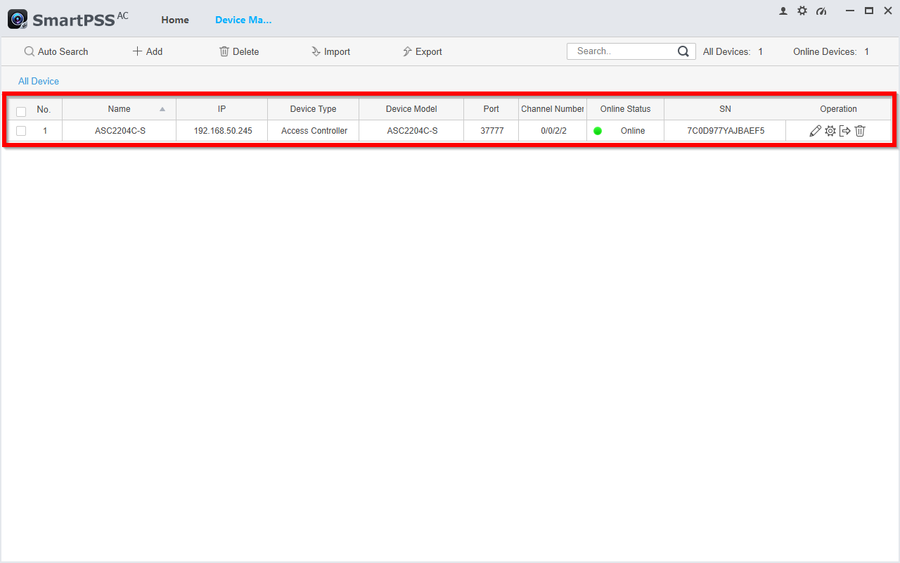
4. You know it was successfull once you see the green status with Online.
5. At this point we recommend you go into the configuration of each door to rename them for an easier experience going forward.
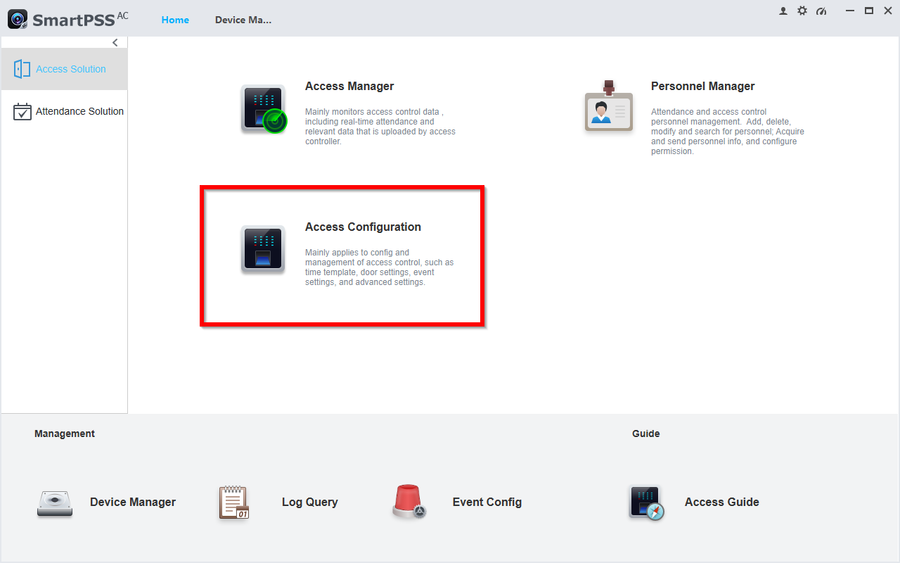
Go back home and go to Access Configuration
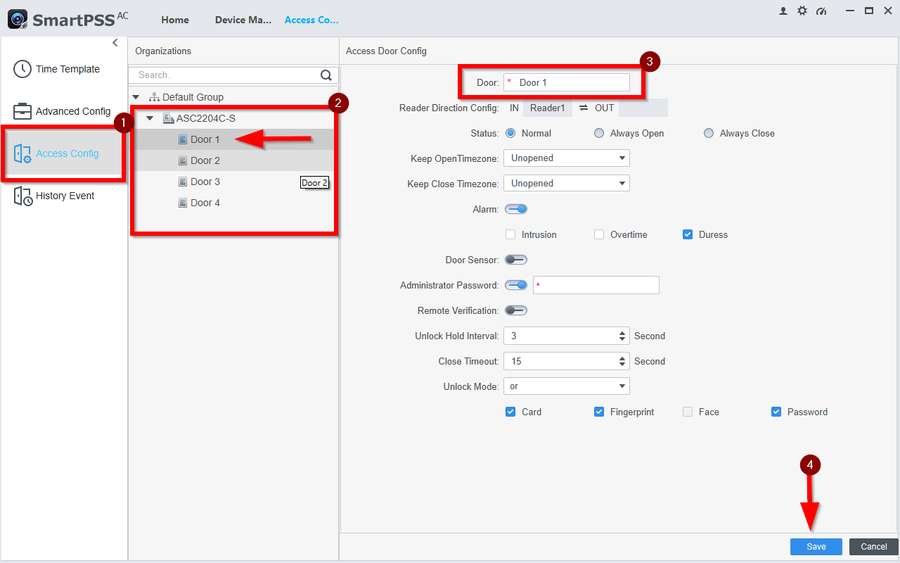
6. On the left tabs click on Access Config -> then click on the door you want to rename -> then under the Door entry type the new name
Then click on Save
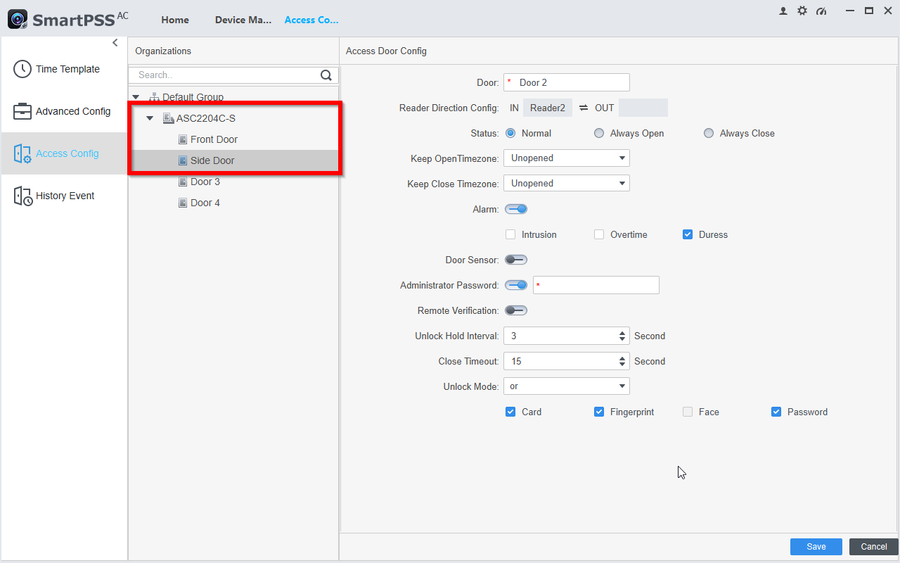
7. You should now see the Doors renamed
To continue with the setup please follow these next instructions How to create Time Templates and Holiday Schedules on SmartPSS-AC
