Access Control/How to Add Users With Pins Cards and Fingerprints to SMARTPSS AC
Contents
NOTICE
Notice of Discontinuation of SmartPSS
Description
This article will go over adding users with all three methods of authentication for doors on SmartPSS-AC.
- How to add a user: Adding users through the "Personnel Manager" tab will allow you to open doors via the three authentication methods (Pins, Cards, Fingerprints)
- How to assign PINs to Users: PINs can be assigned to each user to be able to open a door. PINs need to be at least a 6 digit number.
- How to assign Cards to Users: Cards can be assigned via Dahua Card Reader or using Dahua Card Enrollment Reader (ASM100)
- How to assign Fingerprints to Users: Fingerprints can be assigned to users via Dahua Fingerprints Reader or Dahua Fingerprint Enrollment Reader (ASM202)
Prerequisites
This article follows a series of instructions. If you have not followed our previous instruction please do so before continuing.
- How to add an Access Controller to SmartPSS-AC
- How to create Time Templates and Holiday Schedules on SmartPSS-AC
Step by Step Instructions
How to add a User
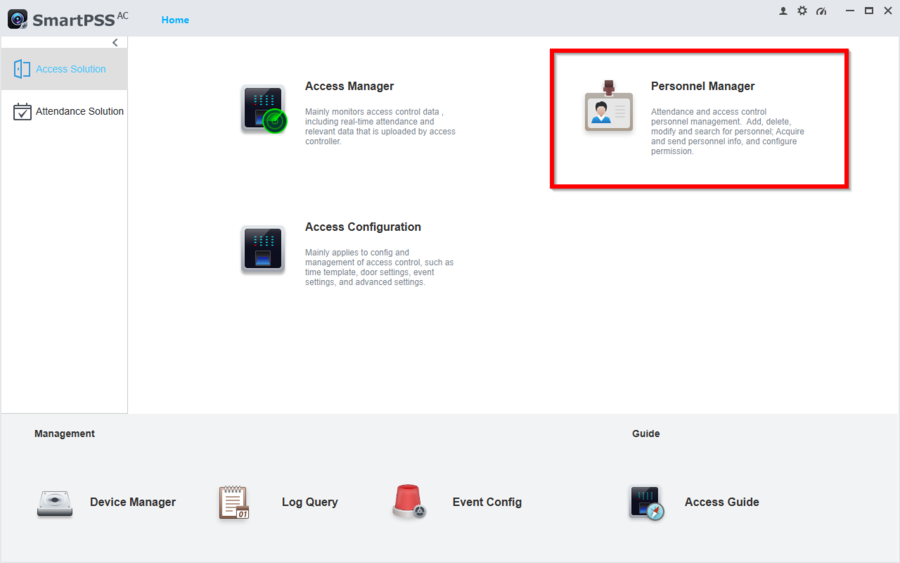
1. Go to Personnel Manager
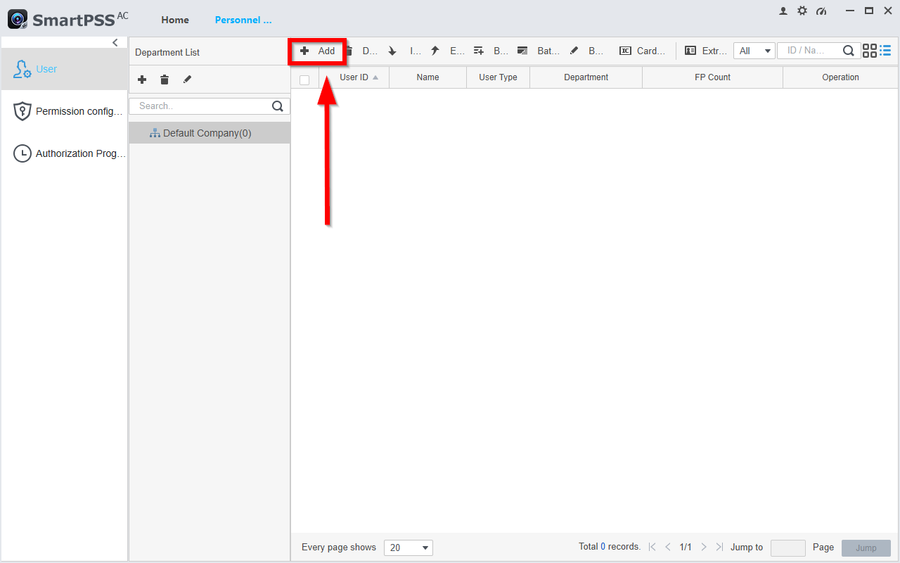
2. Click on Add
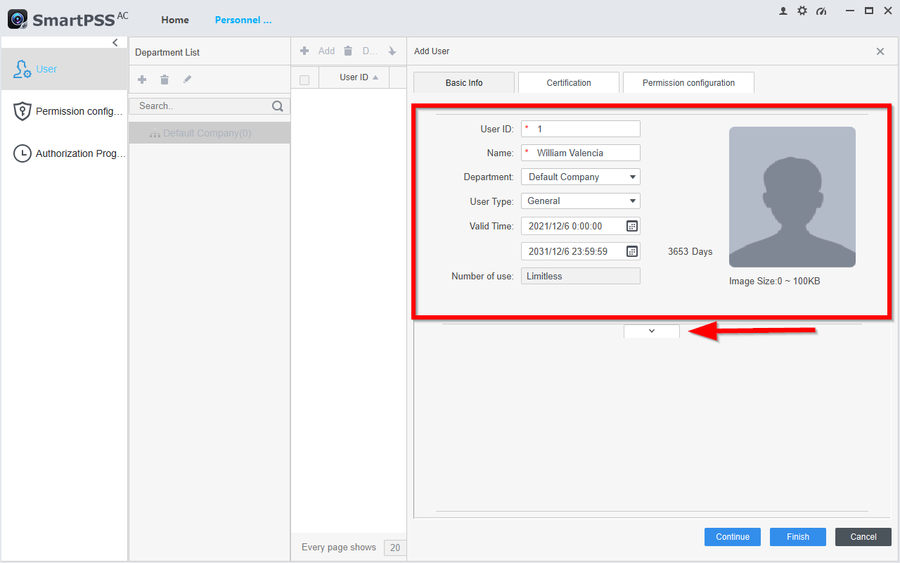
3. Assign the user a User ID and a Name. Click on the dropdown arrow to reveal more details.
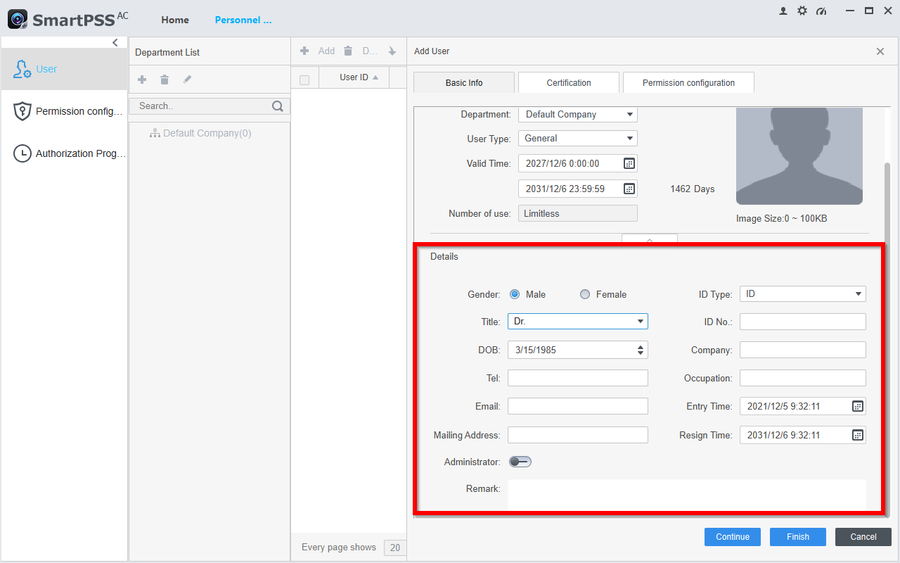
4. You can now further customize the user's entry. Click Finish to complete adding the user.
How to assign PINs to Users
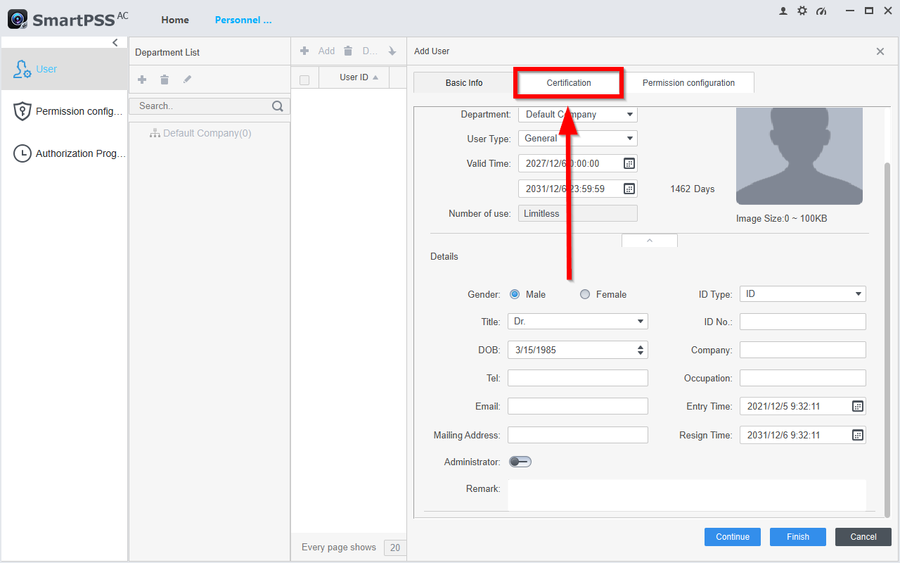
5. Go to Certification on the user.
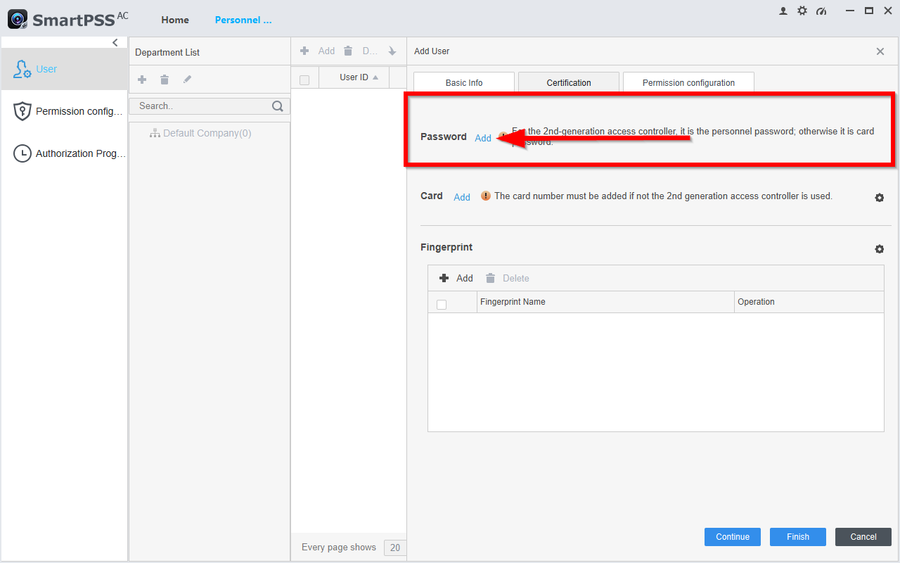
6. Click on Add to create a PIN
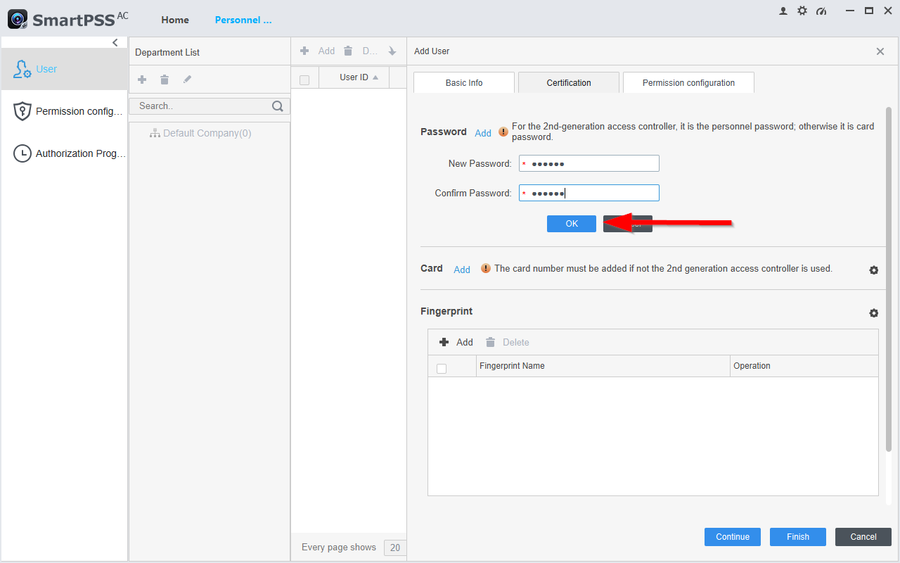
7. Enter at least a 6-digit password and confirm it. Then click on OK to save the entry. Then click on Finish to finalize the new PIN.
Note: to enter the PIN you will need to enter the UserID#6-digit# (i.e. 1#123456#)
How to assign Cards to Users
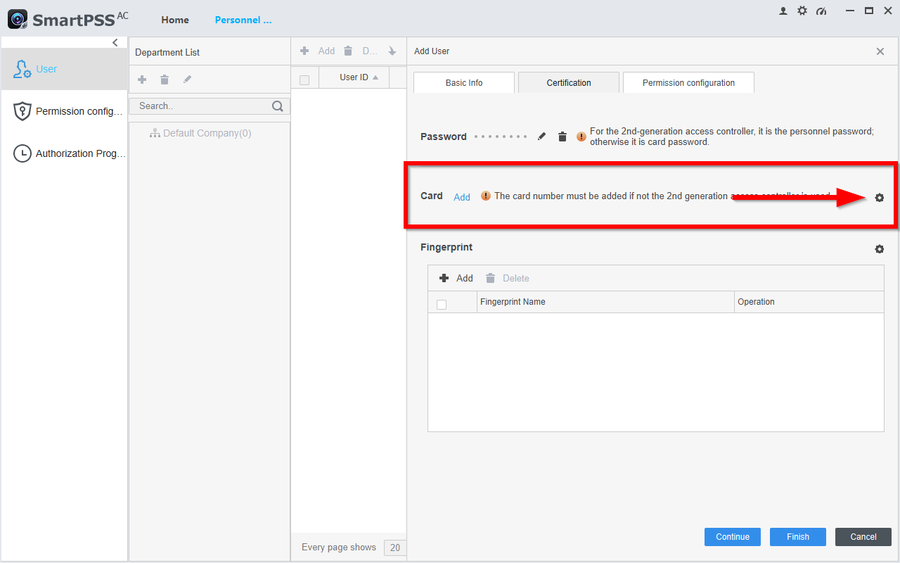
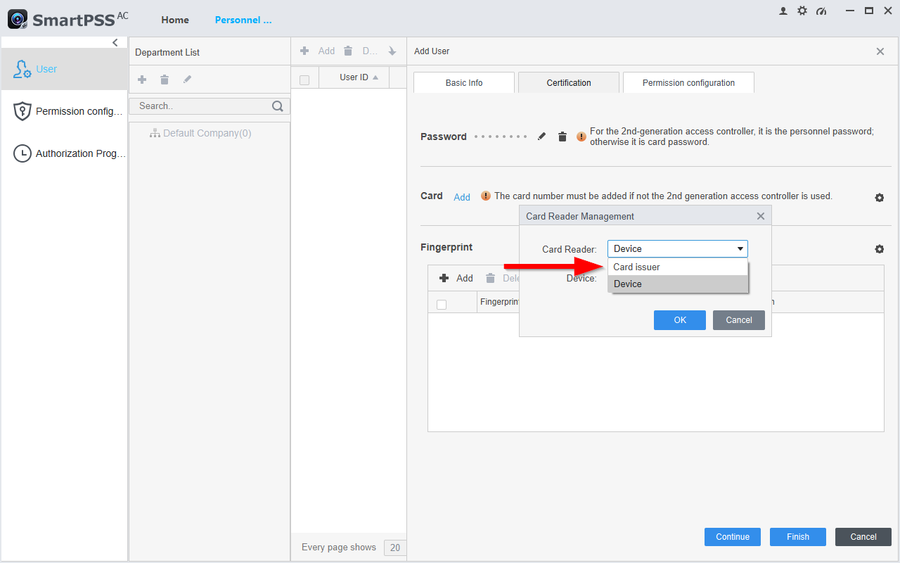
8. To add a card you first need to select the method. Click on the Gear Icon to select the method of adding the card.
9. If you purchased the ASM100 then select Card Issuer
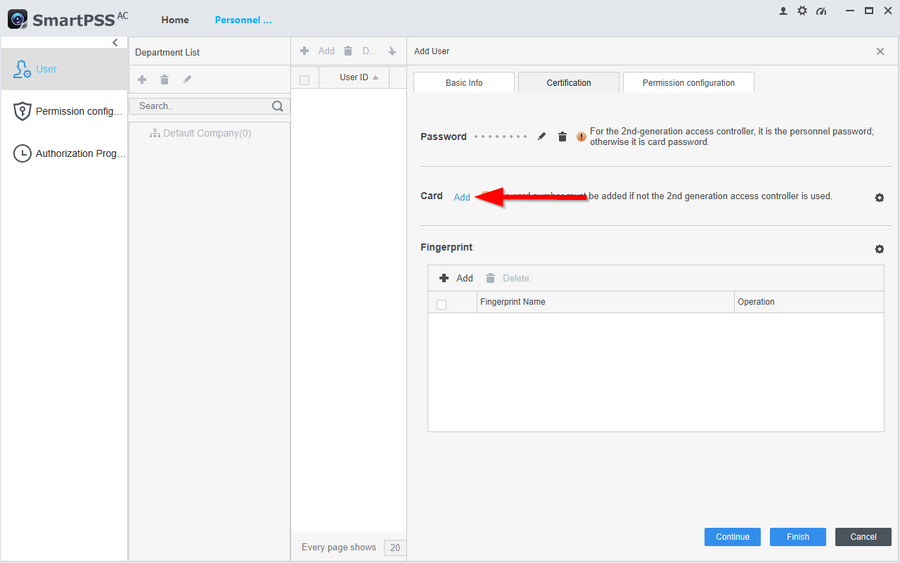
10. Then click on Add
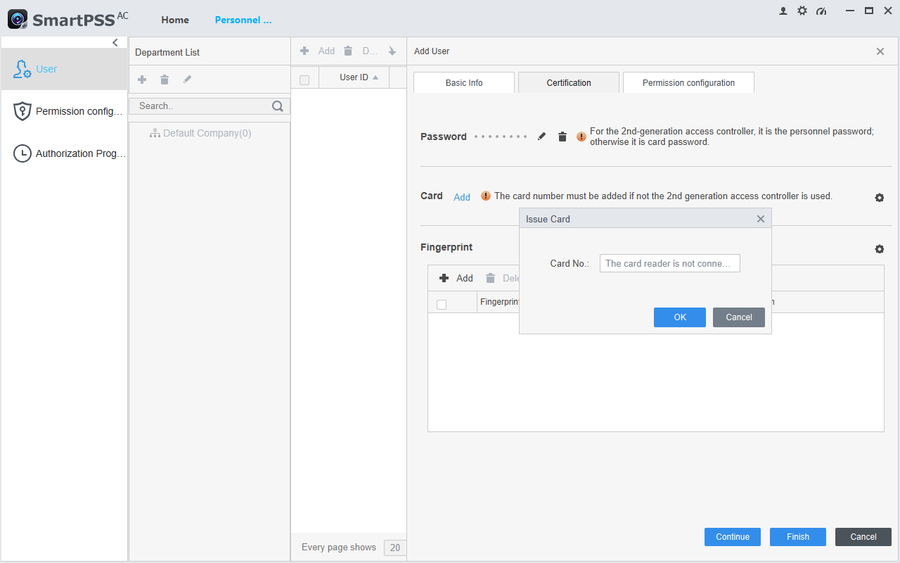
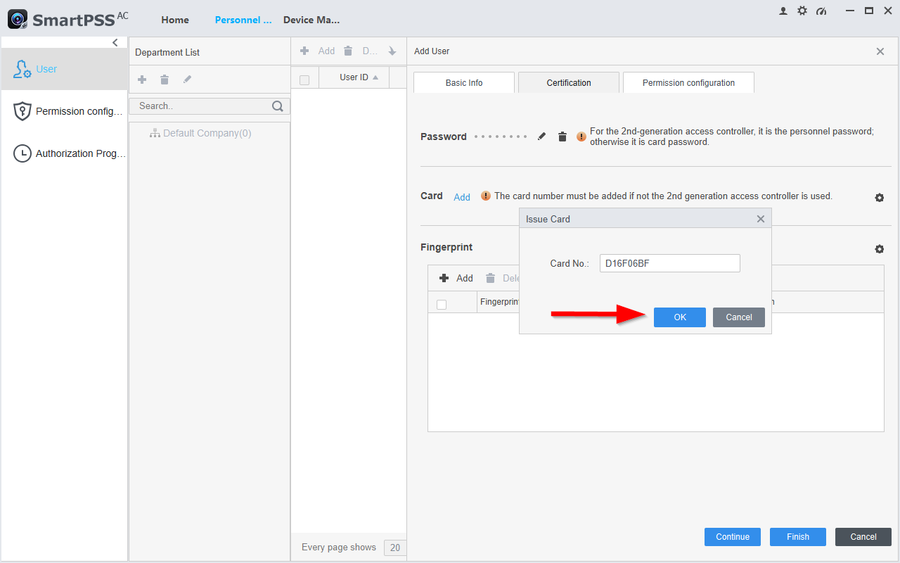
11. Scan the card on the ASM100 and the number will populate on the box entry. Click on OK to confirm.
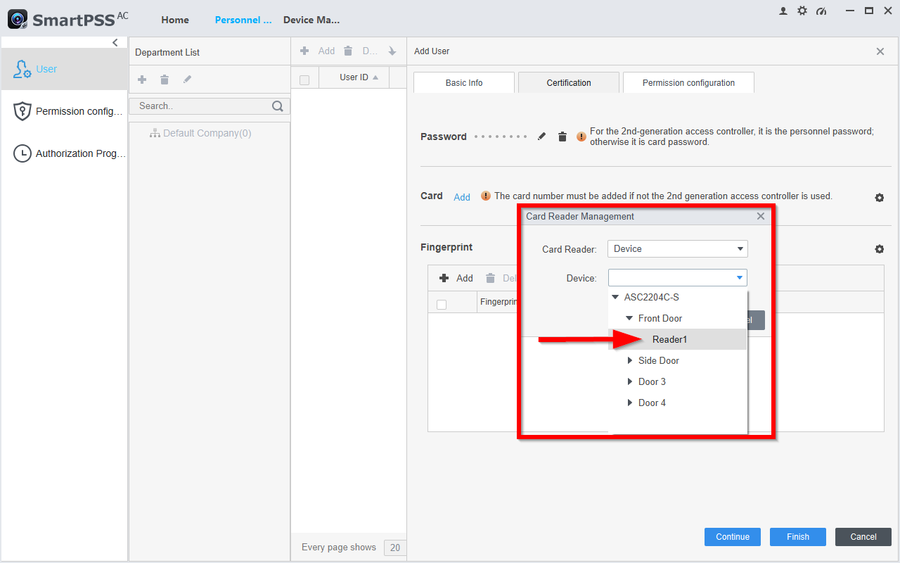
12. If you are using an existing Card Reader on the Access Controller then select the Door the reader is on. In this example I have the Card Reader on Door 1 which I renamed to Front Door.
13. Scan the card and the number should populate on the box entry. Click on OK to confirm.
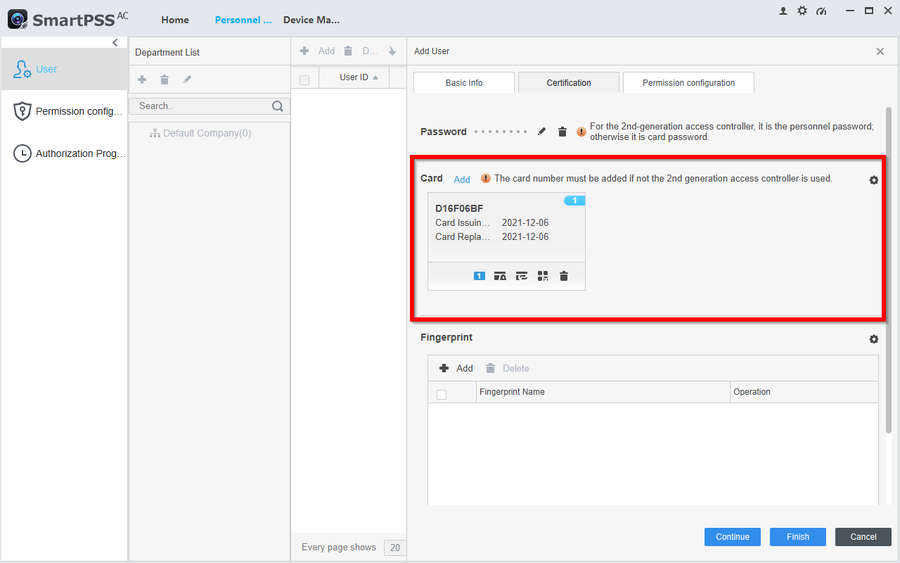
14. You will now see the Card entry if done correctly. Click on Finish to save any changes.
How to assign Fingerprints to Users
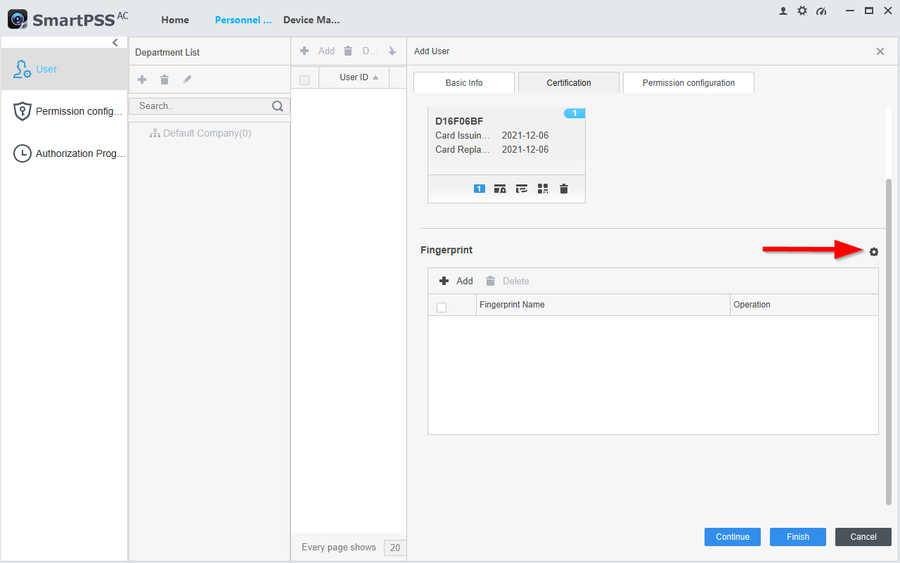
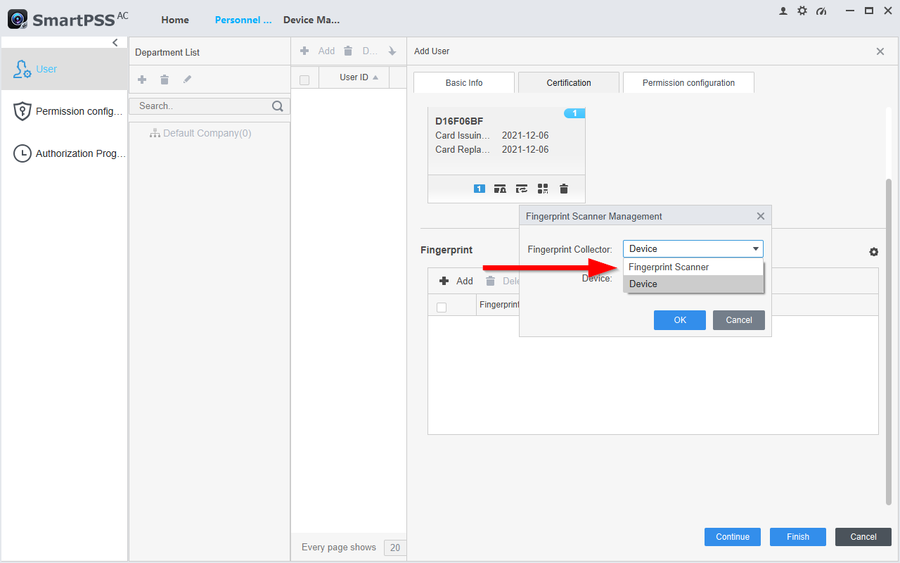
15. To add a Finger print you first need to select the method. Go to the gear Icon to select how you will be registering the fingerprint.
16. If you purchased our ASM202 select Fingerprint Scanner
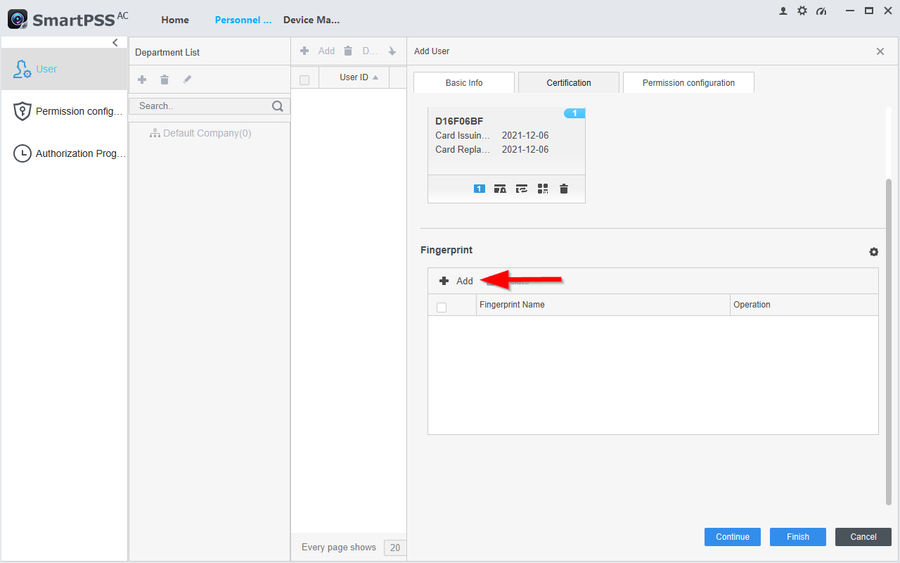
17. Then click on Add
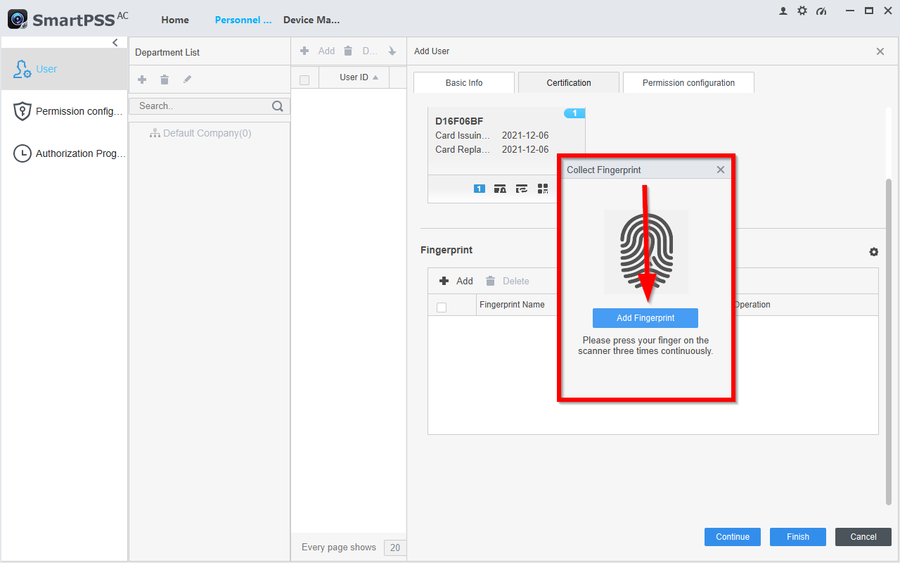
18. Select Add Fingerprint, then place your finger on the scanner. It will need to scan your finger a total of three times. Please wait for the beep after each scan.
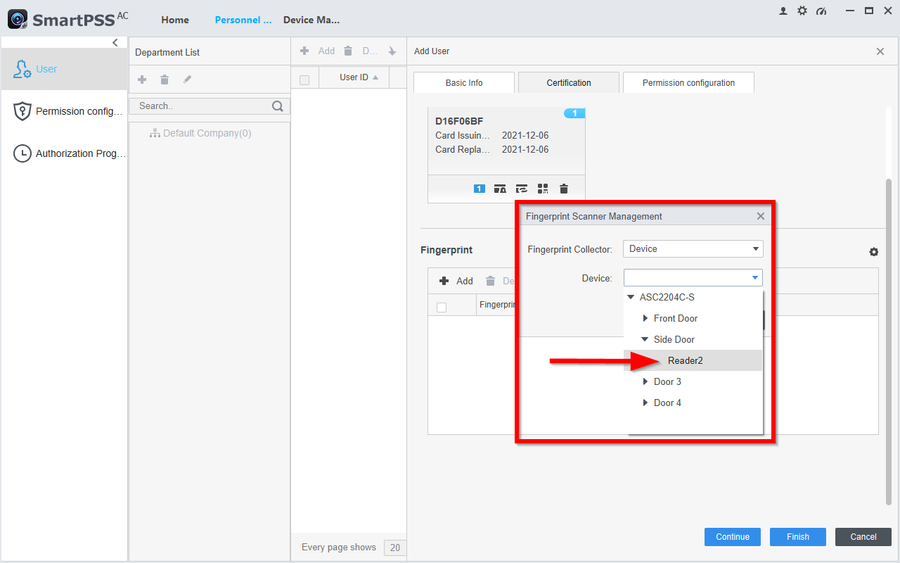
19. In this article we will be using a Fingerprint reader on door 2 named Side Door.
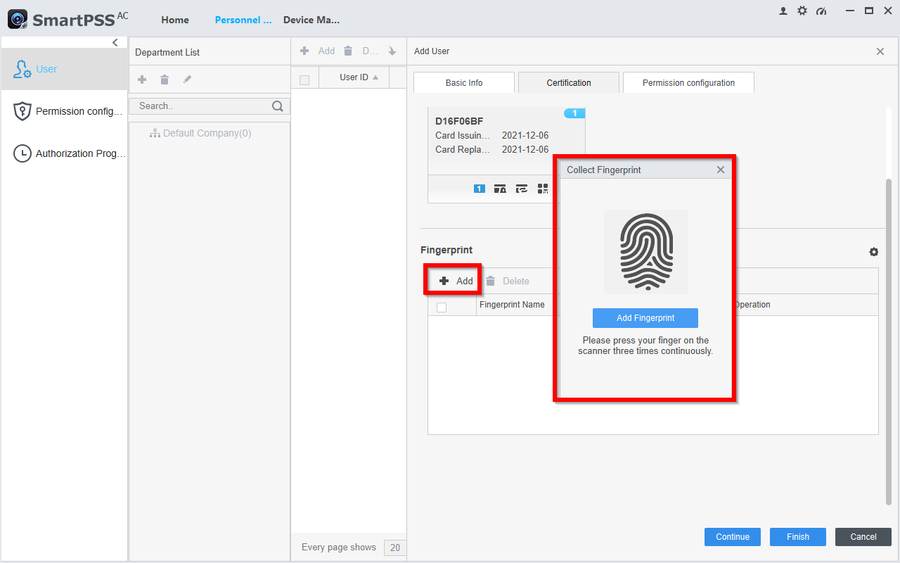
20. Select Add Fingerprint, then place your finger on the scanner. It will need to scan your finger a total of three times. Please wait for the beep after each scan.
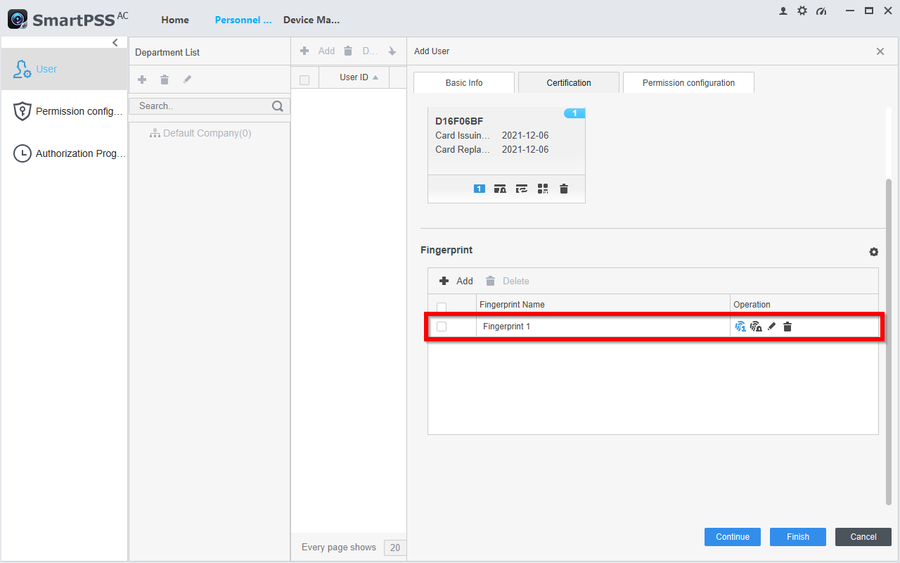
21. You will see the fingerprint entry if done successfully.
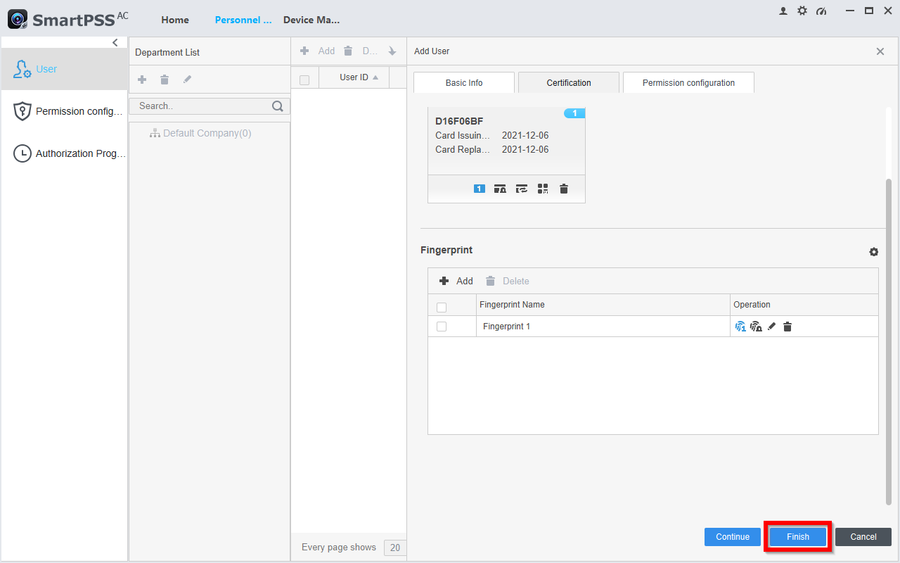
22. Click on Finish to save any changes.
To continue with the setup please follow these next instructions How to Create a Permission Group on SmartPSS AC
