Difference between revisions of "NVR/Quick Start"
| (10 intermediate revisions by the same user not shown) | |||
| Line 3: | Line 3: | ||
===Inventory: Unpack and ensure all items included with the package are present.=== | ===Inventory: Unpack and ensure all items included with the package are present.=== | ||
====NVR/DVR==== | ====NVR/DVR==== | ||
| − | + | <gallery> | |
| − | + | File:DSC_1922_(Large).JPG|NVR Recorder | |
| − | + | file:DSC_1927_(Large).JPG|Power Cable (1 or 2 Pieces Depending on Model) | |
| − | + | DSC_2039_(Large).JPG|Quick Start Guide | |
| − | + | file:DSC_1928_(Large).JPG|USB Mouse | |
| − | + | DSC_2052_(Large).JPG|IR Remote (Not included with all models) | |
| − | + | DSC_2040_(Large).JPG|HDMI Cable | |
| − | + | DSC_2027_(Large).JPG|CAT5 Network Cable (For NVR Only) | |
| + | DSC_2035_(Large).JPG|SATA Cable | ||
| + | </gallery> | ||
| + | |||
====IP Camera==== | ====IP Camera==== | ||
| − | + | <gallery> | |
| − | + | file:DSC_2050_(Large).JPG|IP Camera | |
| − | + | file:DSC_2045_(Large).JPG|Quick Start Manual | |
| − | + | file:DSC_2043_(Large).JPG|Product CD | |
| − | + | file:DSC_2042_(Large).JPG|Mounting Template | |
| + | file:DSC_2047_(Large).JPG|Mounting Hardware | ||
| + | file:DSC_2046_(Large).JPG|Allen key (Not included with all models) | ||
| + | </gallery> | ||
====Accessory==== | ====Accessory==== | ||
*Mount or Accessory | *Mount or Accessory | ||
| Line 28: | Line 34: | ||
===Initial Setup:=== | ===Initial Setup:=== | ||
1. Location: Determine where you will install your system. Ideally, this should be somewhere close to your modem or router. | 1. Location: Determine where you will install your system. Ideally, this should be somewhere close to your modem or router. | ||
| + | |||
| + | [[file:DSC_1931_(Large).JPG|600px]] | ||
| + | |||
2. Connect the mouse to the system’s USB port found on the back of the system. | 2. Connect the mouse to the system’s USB port found on the back of the system. | ||
| + | |||
| + | [[file:DSC_1932_(Large).JPG|600px]] | ||
| + | |||
3. (Optional) Connect a network cable to the system and your router or modem. | 3. (Optional) Connect a network cable to the system and your router or modem. | ||
| + | |||
| + | [[file:DSC_1933_(Large).JPG|600px]]+[[file:DSC_1934_(Large).JPG|600px]] | ||
| + | |||
4. Connect a VGA or HDMI cable to the system and the display. | 4. Connect a VGA or HDMI cable to the system and the display. | ||
| − | + | ||
| + | [[file:DSC_1940_(Large).JPG|600px]] | ||
| + | |||
6. Connect the power cable to your system and surge protector. | 6. Connect the power cable to your system and surge protector. | ||
| + | |||
| + | [[file:DSC_2032_(Large).JPG|600px]] | ||
| + | |||
7. Connect your cameras to the back of the system (and power, if applicable). | 7. Connect your cameras to the back of the system (and power, if applicable). | ||
| − | 8. (If Applicable)Flip the power switch on the back of the unit to boot up your system. | + | |
| + | 8. (If Applicable)Flip the power switch on the back of the unit to boot up your system. | ||
| + | |||
===Quick Setup:=== | ===Quick Setup:=== | ||
Quick Start Wizard: Once the system has booted up, a window will pop-up guiding you through the initial setup of your system. You can change these settings later in case you make a mistake. | Quick Start Wizard: Once the system has booted up, a window will pop-up guiding you through the initial setup of your system. You can change these settings later in case you make a mistake. | ||
| − | *Password: | + | *Password: [[NVR/Basic_Setup/Change_User_Name_or_Password|How to Change User Name and Password]] |
| − | *Date and Time: | + | *Date and Time: [[NVR/Basic_Setup/Date_and_Time|How to Set Date and Time]] |
| − | *Format HDD: | + | *Format HDD: [[NVR/Basic_Setup/Format_HDD|How to Format Hard Drive]] |
===Recording, Playback, and Backup:=== | ===Recording, Playback, and Backup:=== | ||
====Recording: Schedule or Motion==== | ====Recording: Schedule or Motion==== | ||
| − | *Schedule Record: | + | *Schedule Record: [[NVR/Recording_Setup/Schedule_Record|How to Setup Schedule Record]] |
| − | *Motion Record: | + | *Motion Record: [[NVR/Recording_Setup/Motion_Record|How to Setup Motion Record]] |
====Playback==== | ====Playback==== | ||
| − | *NVR Interface: | + | *NVR Interface: [[NVR/Playback/Playback|How to Playback Recorded Video on the NVR]] |
| − | *Web Interface: | + | *Web Interface: [[IP_Camera/Playback/Playback_Web_Browser|How to Playback Video via Web Browser]] |
====Backup==== | ====Backup==== | ||
| − | *Local Backup USB: | + | *Local Backup USB: [[BackupLocal|How to Perform a Local Backup]] |
| − | *Remote Backup Browser: | + | *Remote Backup Browser: [[BackupBrowser|How to Backup Recorded Video via Web Browser]] |
| − | *Remote Backup via SmartPSS: | + | *Remote Backup via SmartPSS: [[BackupSmartPSS|How to Backup Recorded Video via SmartPSS]] |
===Remote Access:=== | ===Remote Access:=== | ||
====Remote Access-PC==== | ====Remote Access-PC==== | ||
| − | *Internet Explorer Setup: | + | *Internet Explorer Setup: [[Troubleshoot/Internet_Explorer|How to Troubleshoot Internet Explorer]] |
| − | *Local (LAN) Access: | + | *Local (LAN) Access: [[ConfigToolLocate|How to Locate NVR on LAN]] |
| − | *Port Forward Setup: | + | *Port Forward Setup: [[RemoteAccessPF|How to Setup Remote Access via Port Forwarding]] |
| − | *P2P Setup: | + | *P2P Setup: [[RemoteAccessP2P|How to Setup Remote Access via P2P]] |
| − | *SmartPSS Access via P2P: | + | *SmartPSS Access via P2P: [[SmartPSSAddP2P|How to Setup Remote Access via P2P and SmartPSS]] |
====Remote Access-Mobile: iDMSS(iPhone) / gDMSS(Android)==== | ====Remote Access-Mobile: iDMSS(iPhone) / gDMSS(Android)==== | ||
*Android Download: https://play.google.com/store/apps/details?id=com.mm.android.direct.gdmssphoneLite | *Android Download: https://play.google.com/store/apps/details?id=com.mm.android.direct.gdmssphoneLite | ||
*iPhone Download: https://itunes.apple.com/us/app/idmss-lite/id517936193?mt=8 | *iPhone Download: https://itunes.apple.com/us/app/idmss-lite/id517936193?mt=8 | ||
| − | *Mobile Access via P2P: | + | *Mobile Access via P2P: [[IDMSSP2PSetup|Mobile Access via P2P]] |
| − | *Mobile Access via IP: | + | *Mobile Access via IP: [[IDMSSIPSetup|Mobile Access via IP]] |
[[Category:NVR]] | [[Category:NVR]] | ||
| + | [[Category:Quick Start]] | ||
Latest revision as of 20:20, 3 May 2016
Contents
Quick Start Guide
Note: For more information and instructions on how to operate your Dahua device, please visit www.DahuaWiki.com
Inventory: Unpack and ensure all items included with the package are present.
NVR/DVR
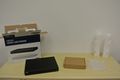
NVR Recorder
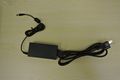
Power Cable (1 or 2 Pieces Depending on Model)
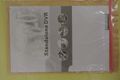
Quick Start Guide
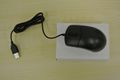
USB Mouse

IR Remote (Not included with all models)
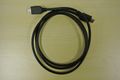
HDMI Cable

CAT5 Network Cable (For NVR Only)
SATA Cable
.JPG)
.JPG)
.JPG)
.JPG)
.JPG)
.JPG)
.JPG)
.JPG)
IP Camera
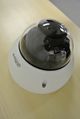
IP Camera
Quick Start Manual
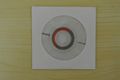
Product CD
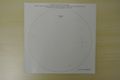
Mounting Template
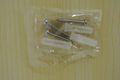
Mounting Hardware
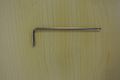
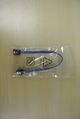
Allen key (Not included with all models)
.JPG)
.JPG)
.JPG)
.JPG)
.JPG)
.JPG)
Accessory
- Mount or Accessory
- Mounting hardware
Necessary (Hardware Not Included)
- 3.5” Hard Drive
- Phillips Screwdriver
- CAT5 Network Cable for cameras
- Internet Connection and Router/Modem (Required for Remote Access)
- VGA or HDMI Display (Preferably 1080P or higher resolution)
Initial Setup:
1. Location: Determine where you will install your system. Ideally, this should be somewhere close to your modem or router.
.JPG)
2. Connect the mouse to the system’s USB port found on the back of the system.
.JPG)
3. (Optional) Connect a network cable to the system and your router or modem.
.JPG) +
+.JPG)
4. Connect a VGA or HDMI cable to the system and the display.
.JPG)
6. Connect the power cable to your system and surge protector.
.JPG)
7. Connect your cameras to the back of the system (and power, if applicable).
8. (If Applicable)Flip the power switch on the back of the unit to boot up your system.
Quick Setup:
Quick Start Wizard: Once the system has booted up, a window will pop-up guiding you through the initial setup of your system. You can change these settings later in case you make a mistake.
- Password: How to Change User Name and Password
- Date and Time: How to Set Date and Time
- Format HDD: How to Format Hard Drive
Recording, Playback, and Backup:
Recording: Schedule or Motion
- Schedule Record: How to Setup Schedule Record
- Motion Record: How to Setup Motion Record
Playback
- NVR Interface: How to Playback Recorded Video on the NVR
- Web Interface: How to Playback Video via Web Browser
Backup
- Local Backup USB: How to Perform a Local Backup
- Remote Backup Browser: How to Backup Recorded Video via Web Browser
- Remote Backup via SmartPSS: How to Backup Recorded Video via SmartPSS
Remote Access:
Remote Access-PC
- Internet Explorer Setup: How to Troubleshoot Internet Explorer
- Local (LAN) Access: How to Locate NVR on LAN
- Port Forward Setup: How to Setup Remote Access via Port Forwarding
- P2P Setup: How to Setup Remote Access via P2P
- SmartPSS Access via P2P: How to Setup Remote Access via P2P and SmartPSS
Remote Access-Mobile: iDMSS(iPhone) / gDMSS(Android)
- Android Download: https://play.google.com/store/apps/details?id=com.mm.android.direct.gdmssphoneLite
- iPhone Download: https://itunes.apple.com/us/app/idmss-lite/id517936193?mt=8
- Mobile Access via P2P: Mobile Access via P2P
- Mobile Access via IP: Mobile Access via IP